During email migration to Office 365 if you need to move data from a PST file, importing PST (Personal Storage Table) files into Office 365 is essential. The majority of customers today favor using Office 365 because it is accessible on all platforms, including PCs, tablets, and smart phones. Thanks to Microsoft for providing such a great productivity platform. The Office 365 edition always includes the most recent upgrades, simple migrations, excellent security, and new apps and features, aside from platform incompatibility. In this article we will learn how to import PST to Office 365 with simple steps.
Table of Content
Import PST to Office 365 by using Network Upload Method
The migration can be done using this way without using any third-party or expensive software at all. Follows all new instructions in order to import PST to Office 365:
A: In Office 365, assign the mailbox import/export role:
- Go to Office 365 Admin account and select Admin from the options.
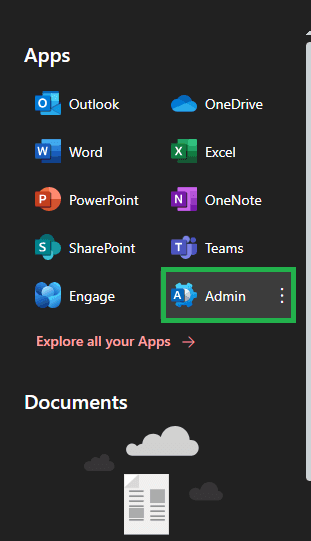
- Select All Admin Center and for opening Exchange Admin Center click on Exchange.

- Go to Admin roles and select Organization Management and click on Permissions.

- Select Mailbox Import Export from the options and click on save.

- Now select Assigned option and click on Add. Now new window is opened as Add admin, select any user you wish to create an import-export session for and click on Add.


B: Make a job and upload a PST file:
First copy and paste the links https://compliance.microsoft.com/homepage on webpage. Further steps are mentioned below:
- Select Data Lifecycle Management and choose Microsoft 365 from the options.

- Click on Import and select new import job.
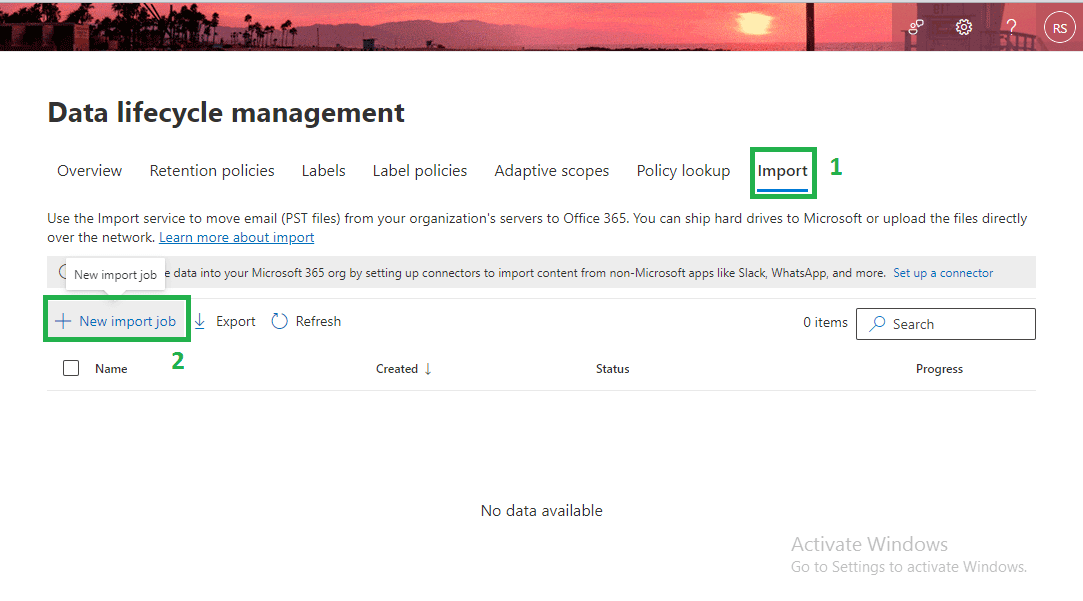
- Enter a job name and click on next.

- Choose upload your data and hit on next.

- Go to step 2 of the Data Import section and select Show network upload SAS URL. When the SAS URL appears, copy it and save it safely.

- Installing Azure AzCopy storage tool now after downloading. Run this tool after installation, then enter the command listed below.
AzCopy.exe/Source:”\\Give PST File Network Path”/ Dest:“Pest SAS URL” /V: “give the location to save log file\log”/Y - After that, enable both options in step 4 (I’m done downloading my files and I have access to the mapping file) and click Next.
- Create a CSV or PST mapping file To do this, you can create a CSV file using Microsoft Excel and add the information in the CSV file according to your requirement as shown in the screenshot.

- To import a CSV file, click +select mapping file, and then press the validate button to see if the file contains any errors. Once the validation was successful, click Save.

- There is now a job for file import. By selecting Refresh, the status can be shown.
- Once the process is complete upload your Outlook PST files.

- Select Import PST to Office 365.

- You currently have two data filters. Select No, I want to import everything from here.
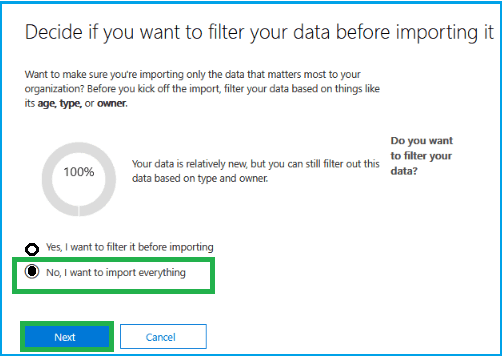
- You can see how much data will be imported into your Office 365 account in the next window. Click on Import data here. Now, the Office 365 account’s PST file database will load and import.
Use Import Export Method to Import PST to Office 365
Additionally, Microsoft allows users to import and export PST files via Microsoft Outlook. You can try this option if the Network upload method fails to provide an accurate result. Therefore, follow to each of the instructions outlined below to quickly transfer your old Outlook data files to Office 365 mailboxes.
A: Outlook Microsoft 365 Account Configuration:
Users must set up their Office 365 accounts in Outlook in order to use this solution.
- Go to Outlook and select File
- Select Add Account.

- Please enter your Microsoft User ID. Select “Advanced options” and turn it on. Let me manually set up my account >> Select Connect.
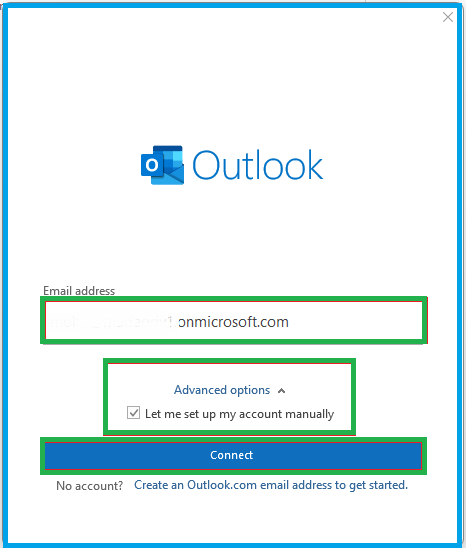
- The advanced setup option is now available. Select Microsoft 365 here >> Enter your password and press the Sing in
- Verify Cache Exchange Mode. Activate it if you want to make a system backup of your data; otherwise, deactivate To finish, select the Next tab.

B: Import PST to Exchange Online Account:
- Restart Outlook > Select Add Files > Select Open & Export > Choose Import & Export.
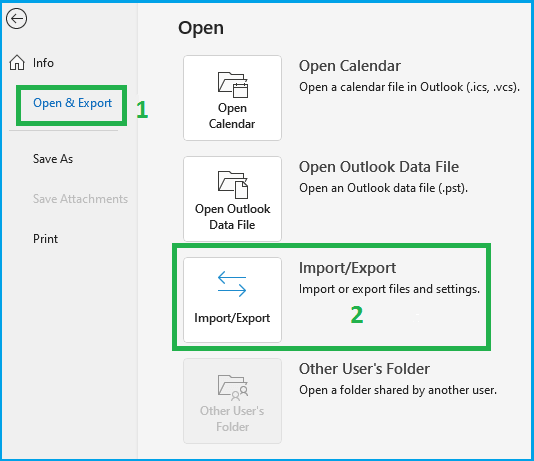
- The Import & Export Wizard Select Import from another programme or file and press the next key.

- Choose Outlook Data Files (.pst) > ad hit the next

- Select Replace duplicates with imported items and click Browse to specify the location of the PST file you wish to import.

- Include Subfolder is now enabled. Select your Microsoft account, then click Finish after selecting Import Items into the Same Folder

- Every piece of data will be synchronized. All of your databases are now accessible via your Office 365 cloud account.
Wrap-Up
In this post, I tried to solve all the queries related to how to import PST to Office 365. Users can select any of the method, according to their suitability and convenience. All of the methods mentioned in this post can be used for uploading PST into Office 365.
Read More: Google Drive to OneDrive

