Microsoft Office 365 is a powerful cloud-based platform that offers multiple services like SharePoint, Exchange Online, Teams, OneDrive, etc. Most businesses use Microsoft 365 for better email management compared to others. Office 365 provides various subscription plans, each offering a different storage space. Over time, the storage reaches its limits, users may face restrictions on sending or receiving emails. To avoid such issues, we need to increase Office 365 mailbox size by assigning additional licenses or enabling archives or through multiple processes.
In this Guide, we will discuss in detail How to check Office 365 mailbox size limits and how to increase mailbox size limits in exchange Online. Before starting the process, you must be aware of the storage options offered by Microsoft Office 365.
Table of Content
Max Mailbox Size Limits in Exchange Online:
Office 365 mailbox size limits depend on two variables, first the type of mailbox and second, the subscription plan purchased by the user. By default, Microsoft provides 50 GB of storage space for standard mailboxes. However, as organizations grow and manage bulk emails with attachments, their storage requirements often increase. Businesses must carefully choose storage plans that align with their current and future communication needs to avoid space limitations.
Generally, the Office 365 mailbox storage limit for the top-tier subscription plan offers up to 100 GB. Archive mailboxes typically provide 50 GB of space, but high-end plans can accommodate up to 1.5 TB with auto-expanding capabilities. Let’s take a detailed look at the different subscription plans available and the corresponding storage capacities they offer to help you choose the most suitable option.
| Feature | Business Basic and Standard | Business
Premium |
Microsoft Enterprise
E3/E5 |
Office 365
Enterprise E1 |
Office 365
Enterprise F3 |
Office 365 Enterprise E3/E5 |
| User Mailbox | 50GB | 50GB | 100GB | 50GB | 2GB | 100GB |
| Archive Mailbox | 50GB | 1.5TB | 1.5TB | 50GB | Not available | 1.5TB |
| Shared Mailbox | 50GB | 50GB | 50GB/100GB | 50GB | 50GB | 50GB/100GB |
| Resource
Mailbox |
50GB | 50GB | 50GB | 50GB | 50GB | 50GB |
| Public
Folder |
100GB | 100GB | 100GB | 100GB | 100GB | 100GB |
| Group Mailbox | 50GB | 50GB | 50GB | 50GB | 50GB | 50GB |
How to Check mailbox size limit in Office 365?
You can check the used or available storage space of your own mailbox in Office 365 Outlook Online. If you are an M365 administrator, you can check any user mailbox storage space through the Exchange admin center. Below both methods are explained step by step.
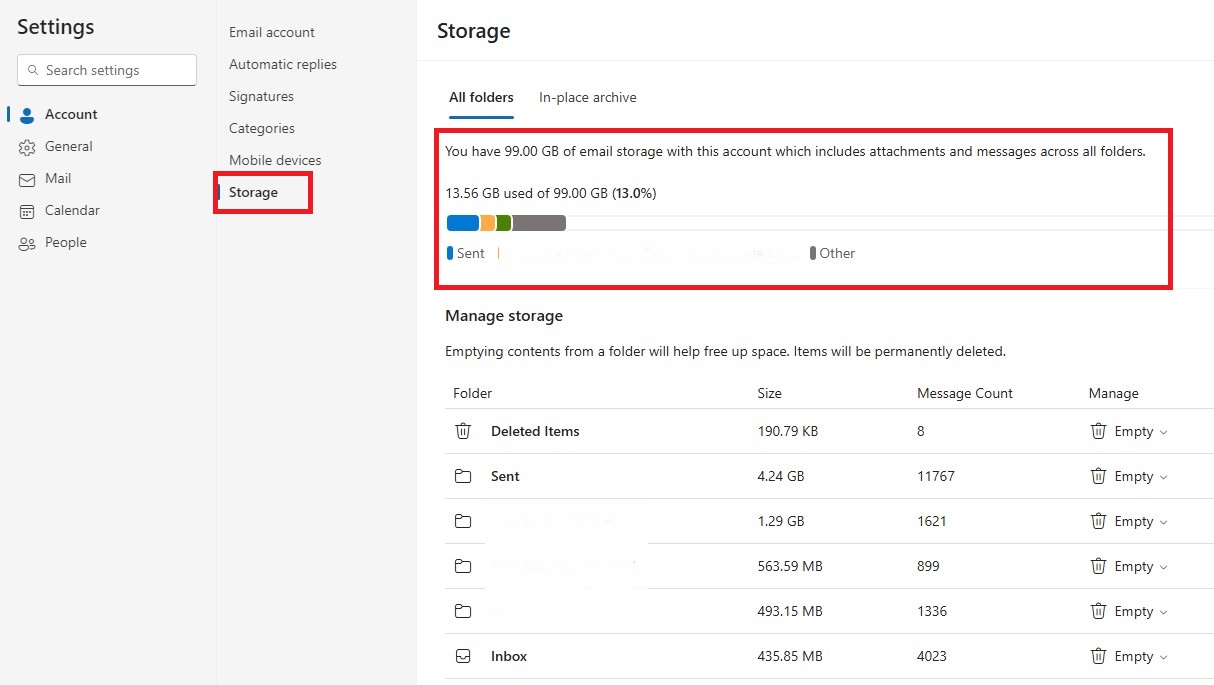
Checking Office 365 mailbox size in Outlook Online:
- Go to https://outlook.office.com on your web browser to login to Outlook Web using your account credentials.
- Now on your computer screen go to the top right-hand corner and click on “Setting”
![]()
- In the setting window click on the “Account”.
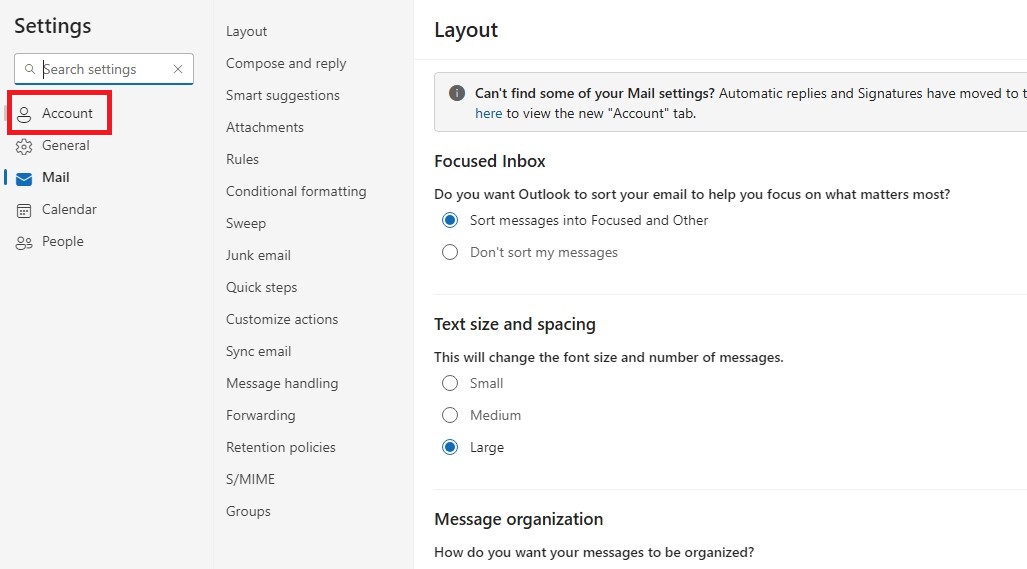
- Finally, click on “Storage”, and you can see your mailbox size limit.
Checking Microsoft 365 mailbox size in the Exchange admin center:
- Go to https://admin.exchange.microsoft.com to open the Exchange admin center on the Web browser.
- Now login with your Microsoft 365 account credentials.
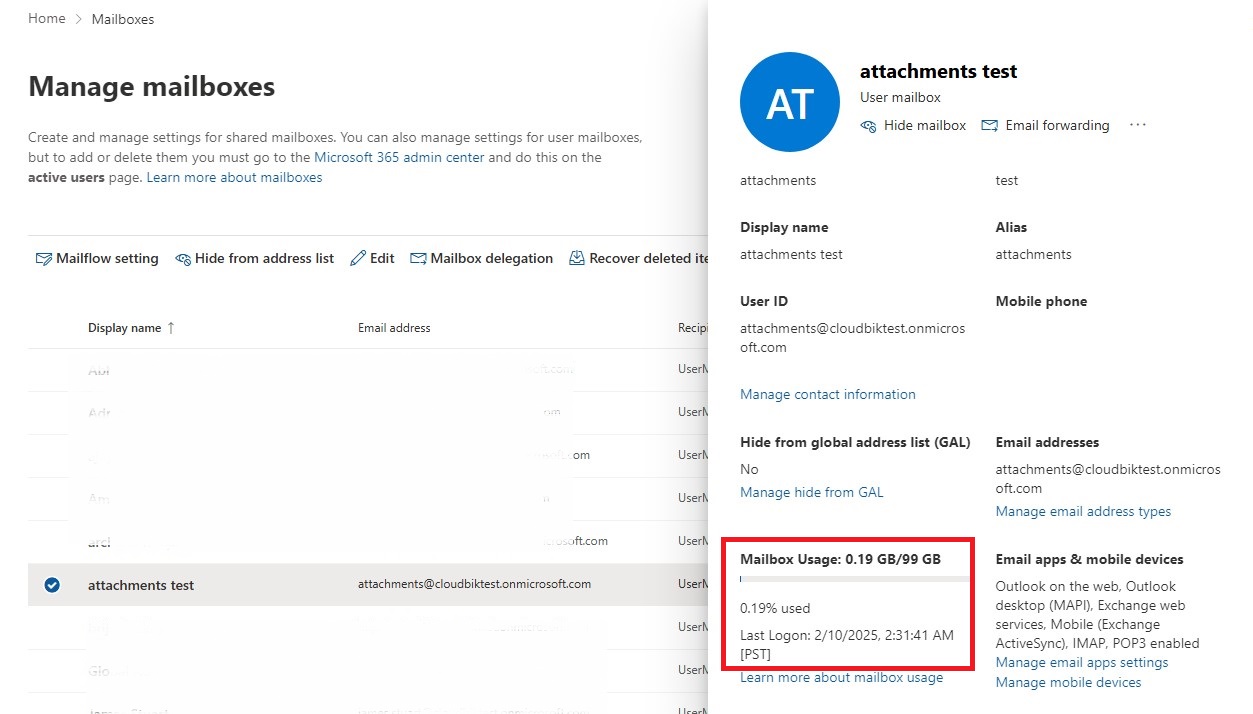
- Click on the “Recipients” button in the navigation pane on the left side of the screen.
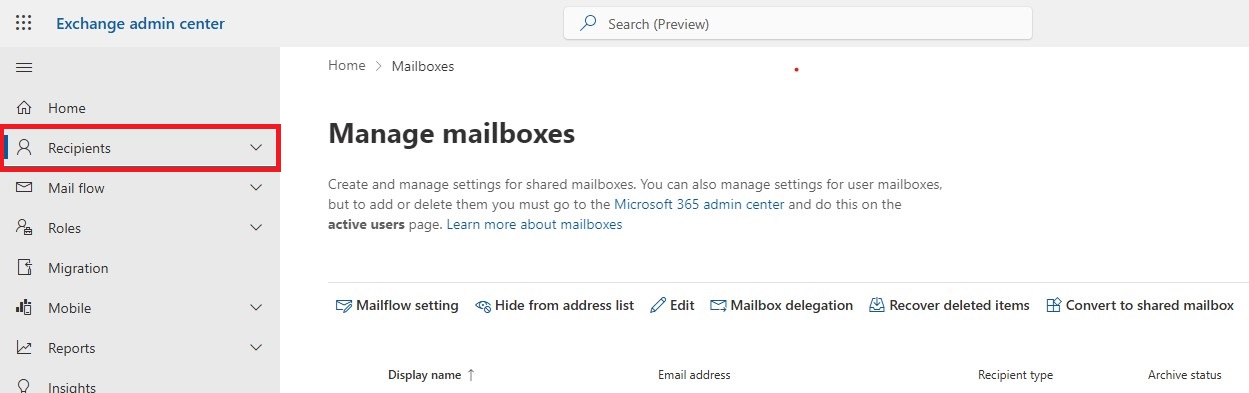
- In the Exchange admin center go to the “Mailboxes” under Recipients and select the “Office 365 account”.
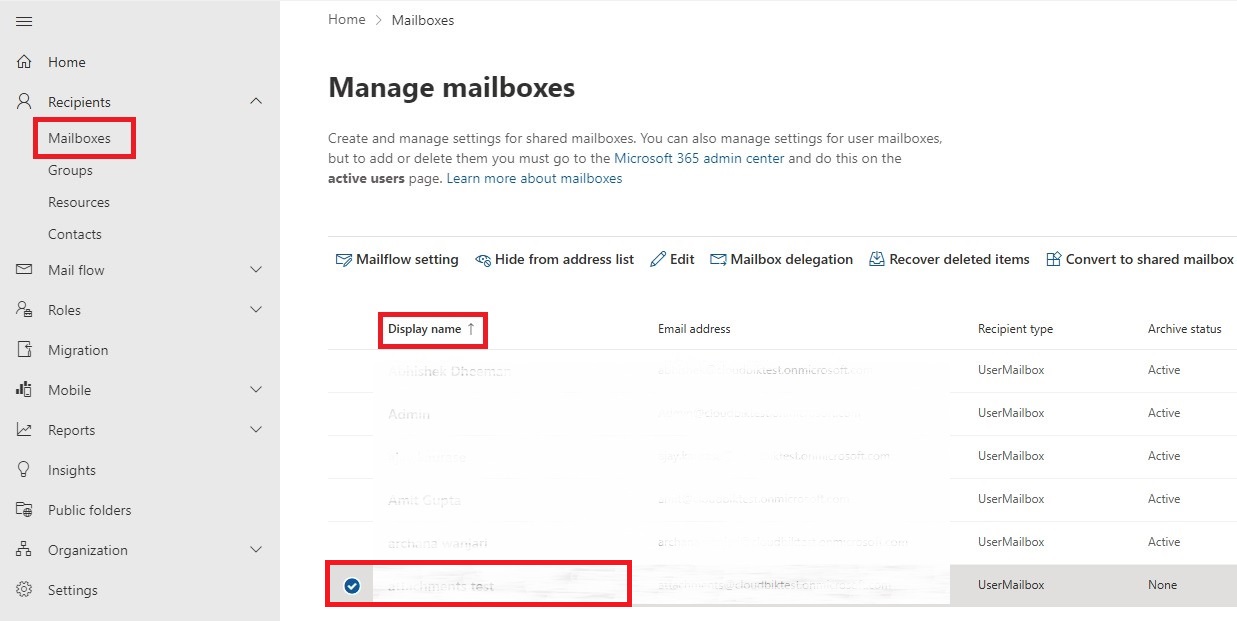
- Now click on the user whose mailbox size you want to check. A new window on the right side will appear, in the general tab you can see the mailbox size for that user as shown in the picture below.
What Happens When an Office 365 Mailbox Size Limit is Reached?
There are three limits in Microsoft 365 Mailbox storage quota: warning limit, send limit, and send/receive limit. When users reach any of these limits, they receive a notification message.
Warning Limit: This notification is received when Office 365 email storage almost reaches its limit. It is a that informs users to delete unnecessary emails to free up some space.
Send Limit: After this notification, you cannot send emails. To resolve this issue, you must delete emails from the mailbox. However, you can still receive messages.
Send/receive limit: Users cannot send or receive emails until the storage is freed up. Each sender who tries to send an email to your account receives a non-delivery report (NDR).
Methods to increase Microsoft 365 mailbox storage limit:
There are several methods to increase the Office 365 mailbox size. Below we explained one-by-one some methods that help you to increase mailbox email storage in Office 365.
Upgrade Your Microsoft 365 Subscription Plan:
To increase Office 365 mailbox storage space, you can switch to a more advanced subscription plan that gives you higher Exchange Online mailbox size limits. It is quick and effective but requires additional cost. If you have a license assigned with 50GB of storage, then you can assign an additional Exchange Online Plan 2 License to increase the storage to 100 GB.
Enable archiving:
Mailbox archive gives you extra storage space of 50 GB or 100 GB in the cloud, allowing you to save old emails without deleting them. The higher Microsoft 365 subscription plans offer up to 1.5 TB of archive storage per user. When you reach the 100 GB limit, another 100 GB is automatically added—this is called auto-expanding. The archive mailbox can only be used to store your own emails, not emails from other users. While your main mailbox data is stored in the cloud and can be accessed through an email client, archived emails are also stored in the cloud.
Steps to Enable Archive Mailbox for Additional Space:
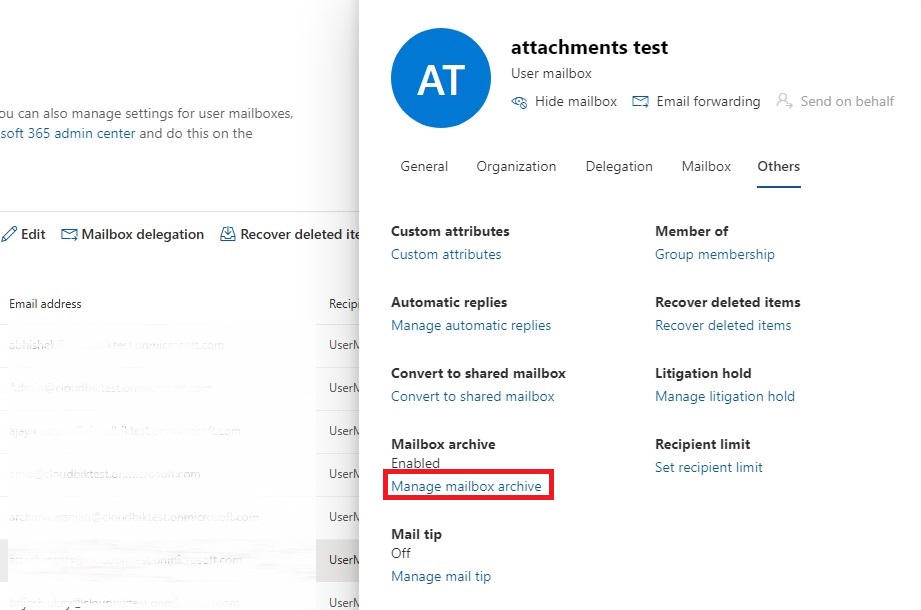
- Visit the Microsoft Exchange Admin Center and open the Mailbox from the left side display pane.
- Select the user account that you want to enable archive mailboxes.
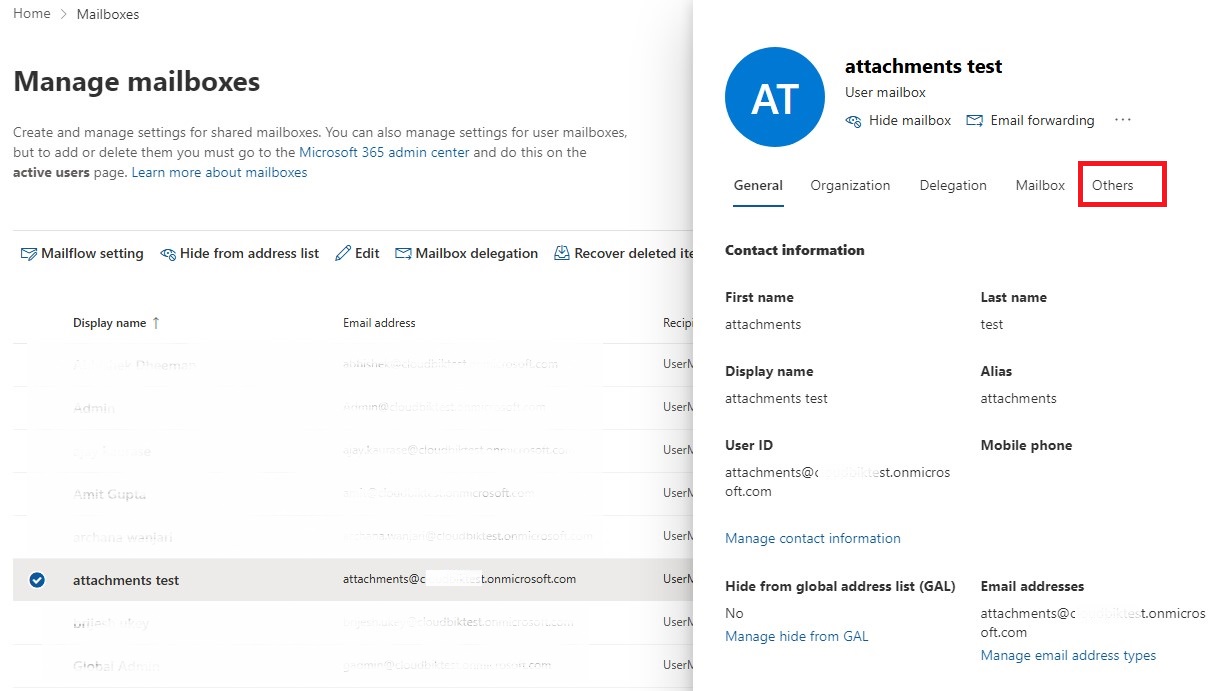
- Now a new window will be open click on the “Others” in the top right-side corner.
- Finally, go to the Mailbox archive and click on “Manage Mailbox archive”, toggle to Enable and save changes.
Edit Mailbox quotas:
When an admin or user purchases a Microsoft 365 subscription plan then the admin can set mailbox quotas per user and modify the warning, send, and send/receive limits. However, these limits cannot exceed the used subscription plans. By default, the warning limit is 98%, the send limit is 99% and send/receive limit is 100% of the total mailbox size. You will be required to use Windows PowerShell to edit mailbox quota size.
Steps to increase Office 365 Mailbox quota:
- Run Windows PowerShell as administrator
- Now connect to the Exchange Online PowerShell using admin credentials by running the command below
Connect-ExchangeOnline
- Once you are connected to Exchange Online, you can use the below-mentioned commands to increase your mailbox quota.
For single Mailbox:
Set-Mailbox user@easilymigrate.com -ProhibitSendQuota 99.9GB -ProhibitSendReceiveQuota 99.9GB -IssueWarningQuota 98GB
Note: Replace “user@easilymigrate.com” with your mailbox address. Use the maximum size according to your mailbox capacity.
For multiple Mailboxes:
Get-Mailbox | Set-Mailbox -ProhibitSendQuota <Value> -ProhibitSendReceiveQuota <Value> -IssueWarningQuota <Value>
Note: Change the value according to your need and mailbox capacity.
Delete non-critical data:
You can delete emails that are not useful or necessary to free up some space from the Office 365 mailbox. Also, you can take a backup of your whole mailbox and empty the complete mailbox if data is not important at this time. You can use the E-discovery method to export your mailboxes to PST format.
Final words:
In this blog, we have discussed all about How to check and increase Office 365 mailbox size in detail. By following the above steps users can learn about multiple ways to increase or free up storage space in Microsoft 365. However, in some cases, you will be required to upgrade your Office 365 subscription plan.
Also Read: Increase Outlook email attachment size limit