Syncing SharePoint with OneDrive is a crucial process for individuals and organizations who want to streamline data management and ensure seamless collaboration. Whether you need to move files from SharePoint to OneDrive or migrate to entire libraries. In this article, we will discuss the step-by-step process of how to add or sync SharePoint with OneDrive. Before we start the process of adding SharePoint to OneDrive, let us know more about it.
Table of Content
SharePoint is a web-based platform by Microsoft for businesses, enterprises, and education that first came into existence in 2001. It is designed for document management, content sharing, and collaboration within organizations like documents, images, videos, web pages, etc.
With Office 365, it allows users to create sites and webpages for organizations to use and manage data via the library.
What is OneDrive?
OneDrive is a Microsoft cloud storage service that provides a secure and convenient way to store your files online. It acts as a personal document library where you can save, access, and organize files, photos, videos, and documents. OneDrive allows seamless file sharing with others and ensures accessibility from any device, such as a computer, tablet, or smartphone, wherever you are.
With OneDrive, you can also create libraries for team collaboration, enabling shared access for members.
OneDrive and SharePoint both are Microsoft cloud services that store various types of data online, but both have slightly different purposes. After successfully syncing SharePoint with OneDrive, you get many benefits which are given below.
Offline Access: Once you sync your library data, you can access it even without an internet connection.
Enhanced Collaboration: As a team member, you’re one step ahead to instantly access your synced file and share it with others.
Improved Productivity: Managing data offline also helps you to enhance organization productivity and streamline the database.
Reduced Complexity: SharePoint can have many sites, webpages, and libraries which is very difficult to manage. Saving items in offline mode helps you to search and manage the data without any hassle.
Step 1: Install OneDrive and Sign in with Office 365 credential.
- Go to the Microsoft’s official website and download OneDrive for Business if you haven’t installed it yet.
- When installation is completed open OneDrive and sign in using your Office 365 account credentials.
- Visit Microsoft 365 and open SharePoint Online.
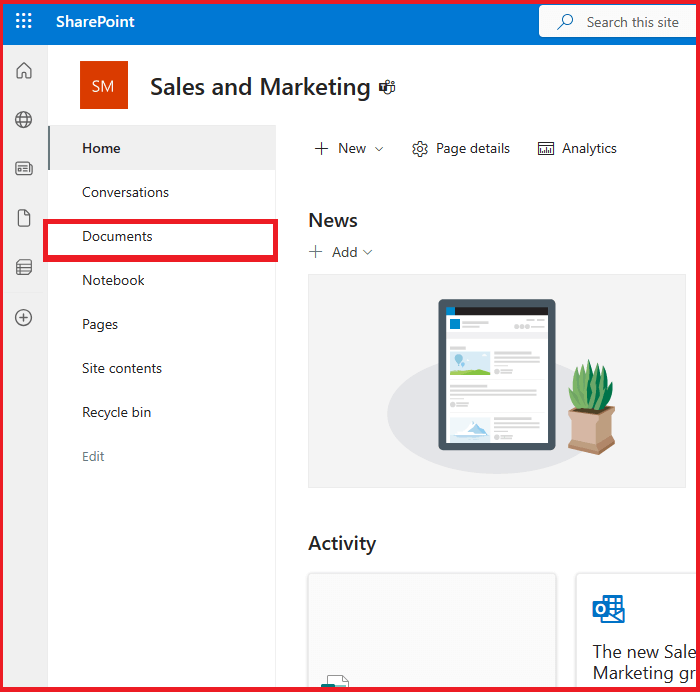
- Now select the SharePoint site you want to sync with OneDrive for Business. If your site isn’t showing up, you can search it by its name.
- After entering the desired SharePoint site, click on the “Documents” located on the left side of the screen.
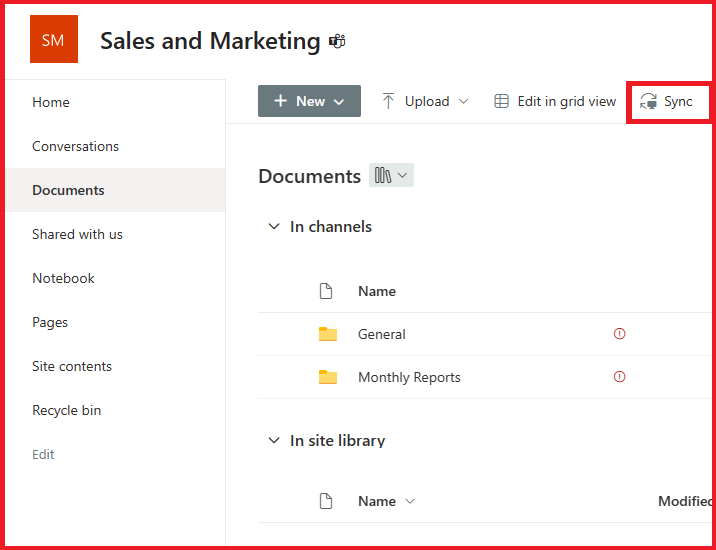
- Now in the “Documents” click on the “Sync” button.
- A new window will appear on the screen, click on “Open” to continue.
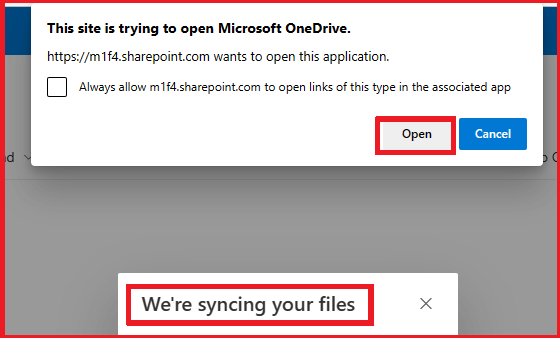
That’s it. We have successfully completed the syncing data from SharePoint to OneDrive. If you add a file to OneDrive, it will automatically get added to SharePoint respectively.
Now we will learn how to access moved SharePoint files in the file explorer.
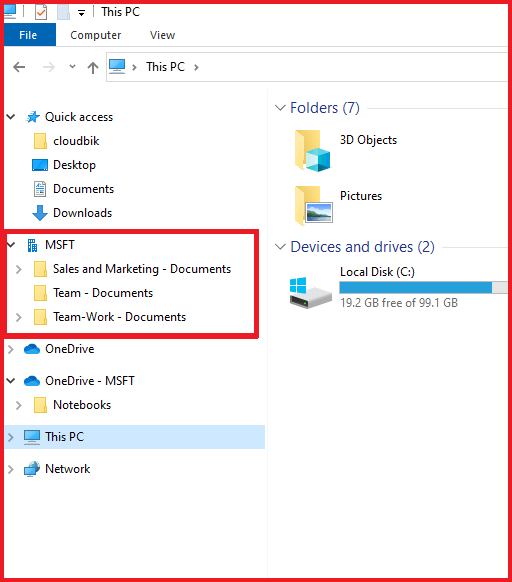
Step 3: Access synced Documents in File Explorer:
- Go to File Explorer, now you can see MSFT SharePoint Library in the left-side corner.
For accessing multiple SharePoint site Documents in OneDrive, follow the same procedure. By following the above steps anyone can easily sync SharePoint with OneDrive.
Note: If you make any changes to the SharePoint Document Library in the File Explorer, it will automatically be changed on the SharePoint site.
Conclusion:
In this guide, we have discussed the complete process to sync SharePoint with OneDrive. By syncing SharePoint to OneDrive, you can enjoy offline accessibility, enhance collaboration, simplify document management, and seamless integration across devices. Follow our step-by-step process outlined in this guide to efficiently sync files from SharePoint to OneDrive.
Read Also: How to recover deleted SharePoint site