Creating a group in Outlook help to reduce the time-consuming task of sending messages to groups by removing the need to enter respective mail addresses on every message. In this post, we offer a helpful tutorial for those who frequently send emails to a particular contact list on how to create email group in Outlook.
Table of Content
Steps to Create Email Group in Outlook, Distribution List, Contact List, Contact Group
Follow the steps listed below to create an email group, contact group, distribution list, and contact list in Outlook
Contact List
Microsoft Outlook Contact List, also known as Contact Group, is a useful tool that helps users organize and manage their contacts. For individuals and organizations that regularly need to communicate with specific groups of people, this feature is extremely beneficial. Whether you’re working on a project, planning an event, or just looking to improve your communication, Outlook Contact Groups can be a helpful tool.
Procedure to create a Contact List/ Group
To create a contact list/ group follow the mentioned below steps:
- Open Outlook Online.
- Select People > Go to New contact > Choose New Contact List.

- In the next window provide a name to Contact List. The co-workers cannot see the name of the contact list > add description > click on create for further process.

- By selecting Groups in Outlook, you can quickly add or remove contacts from the list. Click Edit in the menu bar to make changes to the group after selecting your list.
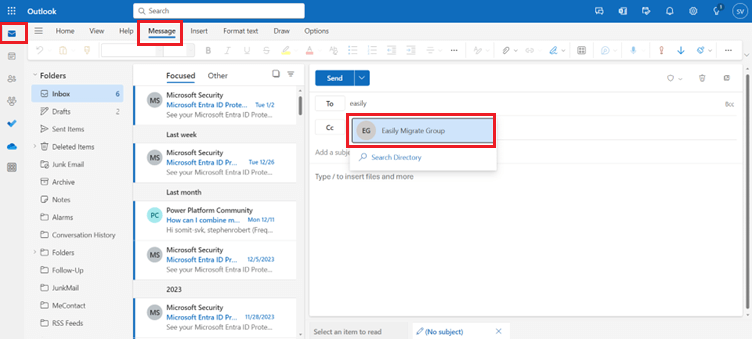
- Now click on Mail > New Mail > Type the name of the contact List that you created. If you wanted to check all the members of the group, click on “+” to check.
Make a Contact Group
If the updated Outlook app is not being used, you can still create a contact group in Outlook. An Outlook contact group will appear in Outlook Online as a contact list, and the concept is the same as that of a contact list.
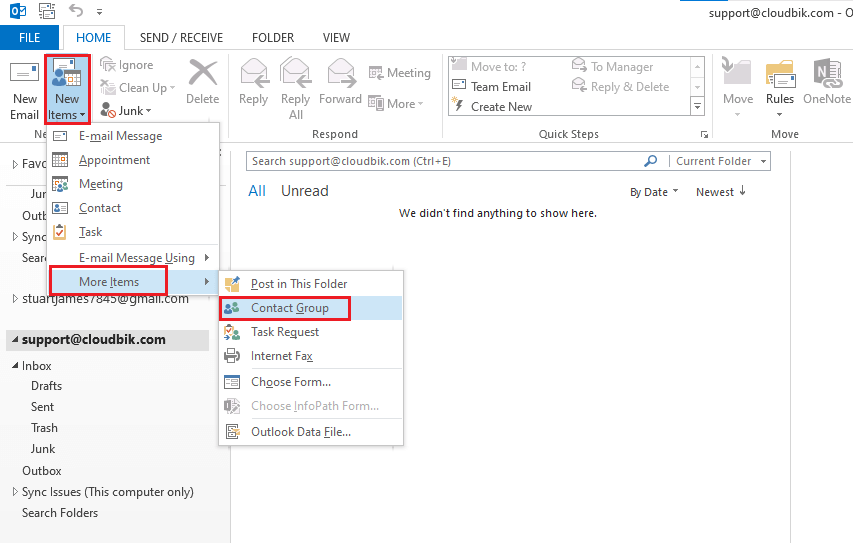
- Open Outlook Application in your system > Go to new item > click on more item > select Contact Group.
- Enter a name of group > add users that you wish to add by clicking on Add members > select the required option.

- At this point, you can choose which contact to add to the group. To view all of your contacts, switch the Address Book to the Global Address List. When finished, select Save & Close and click OK in the menu bar (ribbon).
Create Email Group in Outlook
Email groups are actually Microsoft 365 Groups. Keep in mind that a Microsoft 365 Group is more than just an email group, even though it shouldn’t be an issue. It also comes with a planner, a Teams group, a group inbox, and a file-sharing SharePoint site.
Again, let’s begin by going over how to utilize Outlook Online and the new Outlook app:
- Go to People > New contact > Click on New group.

- Add the name of the group > and write the description > click on create.

- You also have the ability to change the privacy settings for the group. It’s private by default, but you can set it to public. When the group is public, anyone can join without authorization. We can add members once the group has been created.
- It is now possible to add new members to the group, both internal and external. Simply start typing someone’s name or email address to add them. When you’re done, choose Add to include the participants. Each member will receive an email verifying enrolment and authorization to collaborate.

Create Distribution List
Distribution lists cannot be created in Outlook; only IT administrators are able to create them in Exchange Online.
To create a distribution list, we have to open Exchange Online or Microsoft 365 Admin Centre.
- Open Microsoft 365 Admin Center.
- Select Teams & Groups > Active Teams & Groups > Select Distribution List > Add a distribution list.

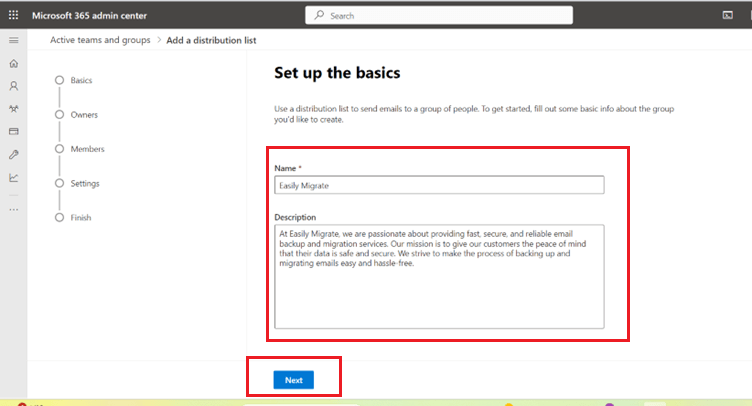
- In the Set-up basics window enter the name of distribution list > add description> press the next
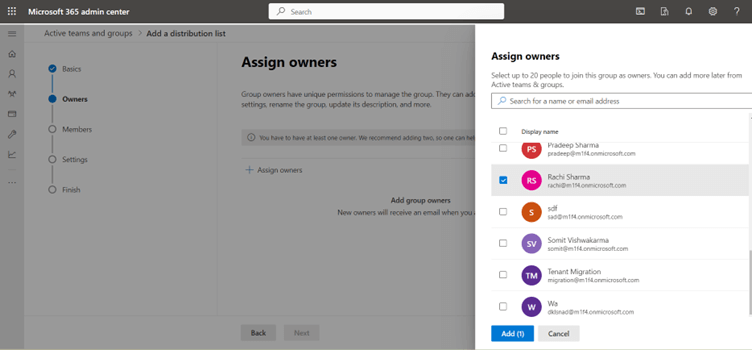
- In Assign Owner window assign an owner of the group > click on add > click on next.
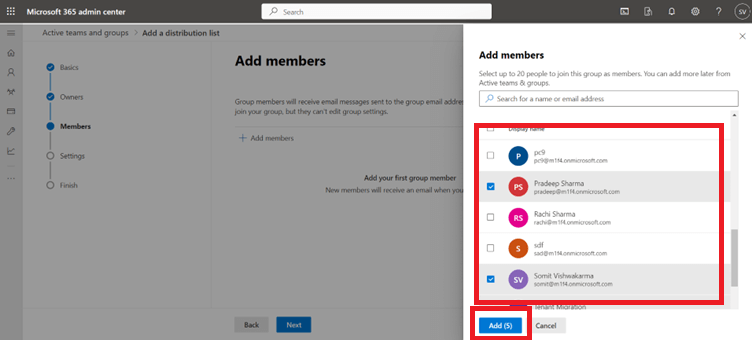
- Add members in this window by selecting users > Click on Add > select next button.
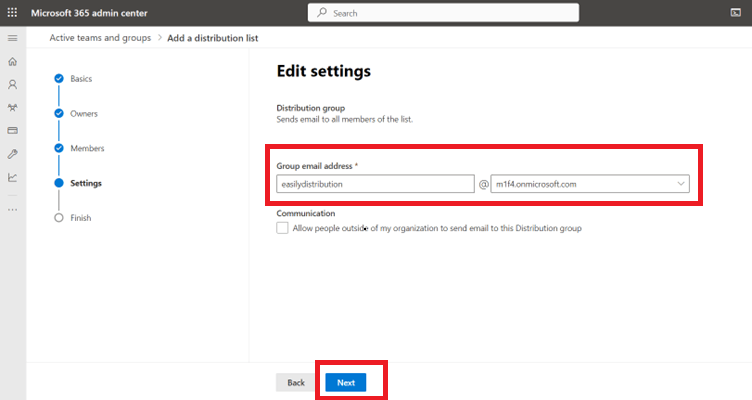
- Click next after giving the distribution list an email address.
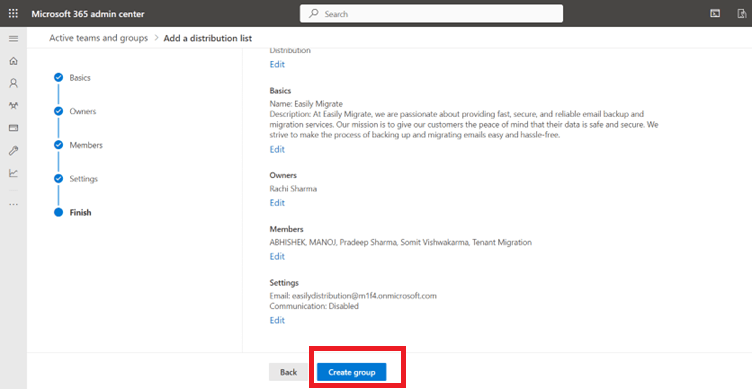
- After reviewing your information, choose “Create group.”
You can send emails to the distribution list from any user in your organization.
Wrap- Up
To sum up, setting up email groups in Outlook is an easy and effective method to increase productivity and organize your messages. You can send emails to multiple recipients with ease and without the headache of having to choose each recipient by hand by grouping your contacts. Email groups can help you save time and effort when organizing events, managing a team, or liaising with clients. Don’t forget to pay attention to the detailed instructions we previously covered in order to efficiently create email group in Outlook.
Read More: GoDaddy to Microsoft 365 Migration
Convert Personal Gmail to G-suite