Doing a mail merge in Outlook allows you to send customized bulk emails to a big mailing list at a same time. If you’ve never done a mail merge in Outlook, you could feel overloaded. There are several steps, and a small error might ruin the entire procedure. However, if you know what you’re doing, it’s really not that difficult. This post will walk you through the specific steps for using Microsoft Word to successfully complete an Outlook mail merge.
Table of Content
How to send mass email using Mail Merge in Outlook
To write personalized emails, you’ll need a word document. To merge mail, you’ll need an excel sheet with your contacts list.
- Make the excel sheet contains all the emails address of the users for sending the email and save the excel file.

- Go to Microsoft word, and start writing the message that you want to share with the selected people.
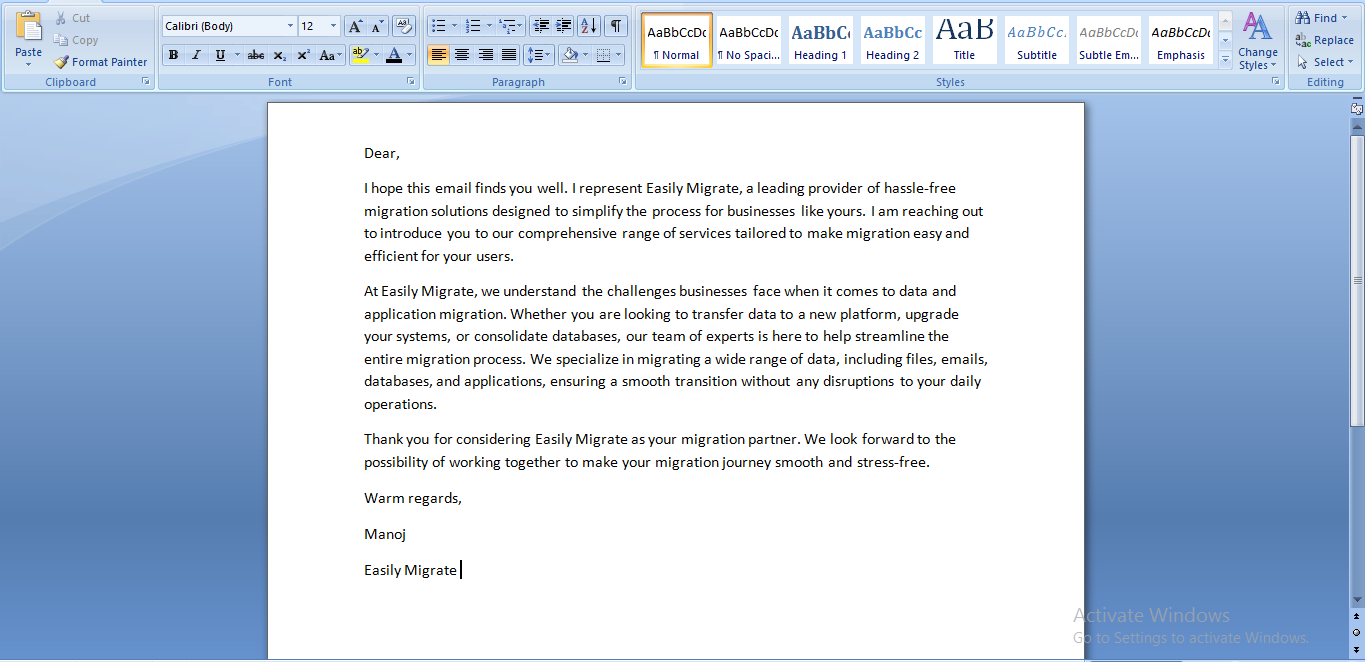
- Select the Mailing Tab > click on Start Mail Merge > and select Step-by-step Mail Merge Wizard.
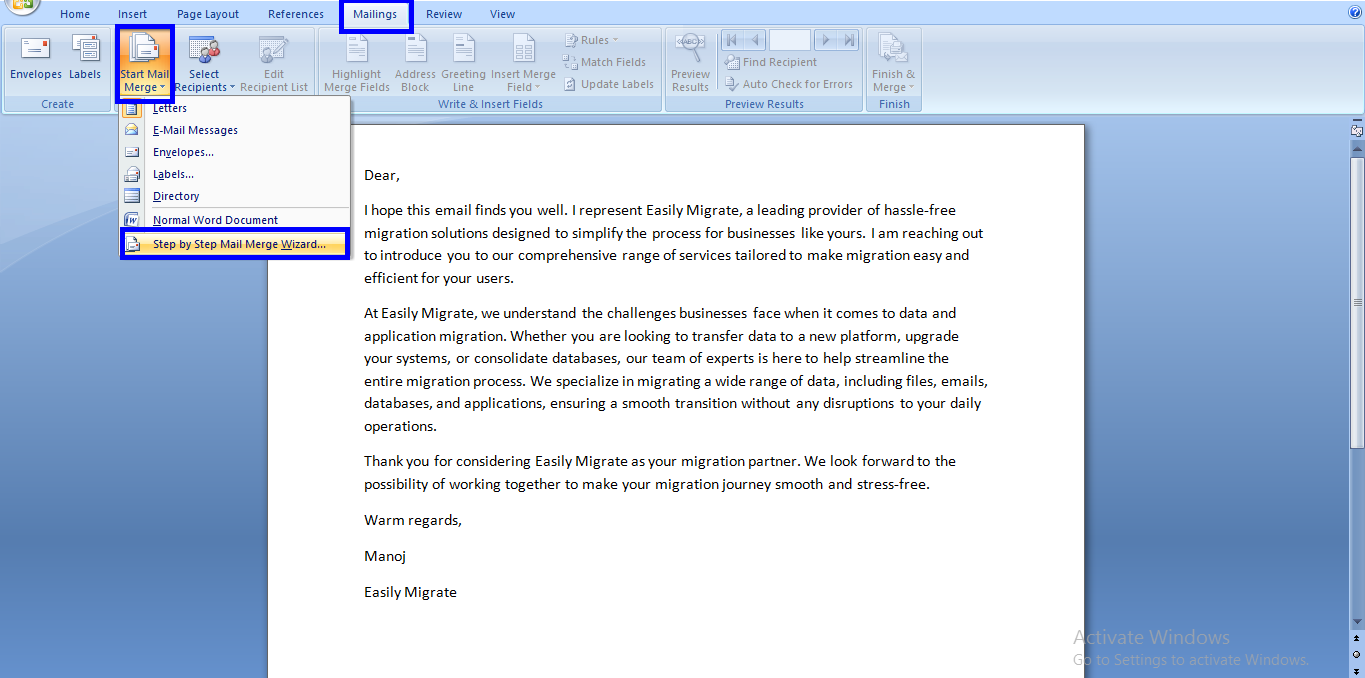
- The mail merge wizard will appear on the right side. Select either letters or emails from the list of options, and then click the Next.
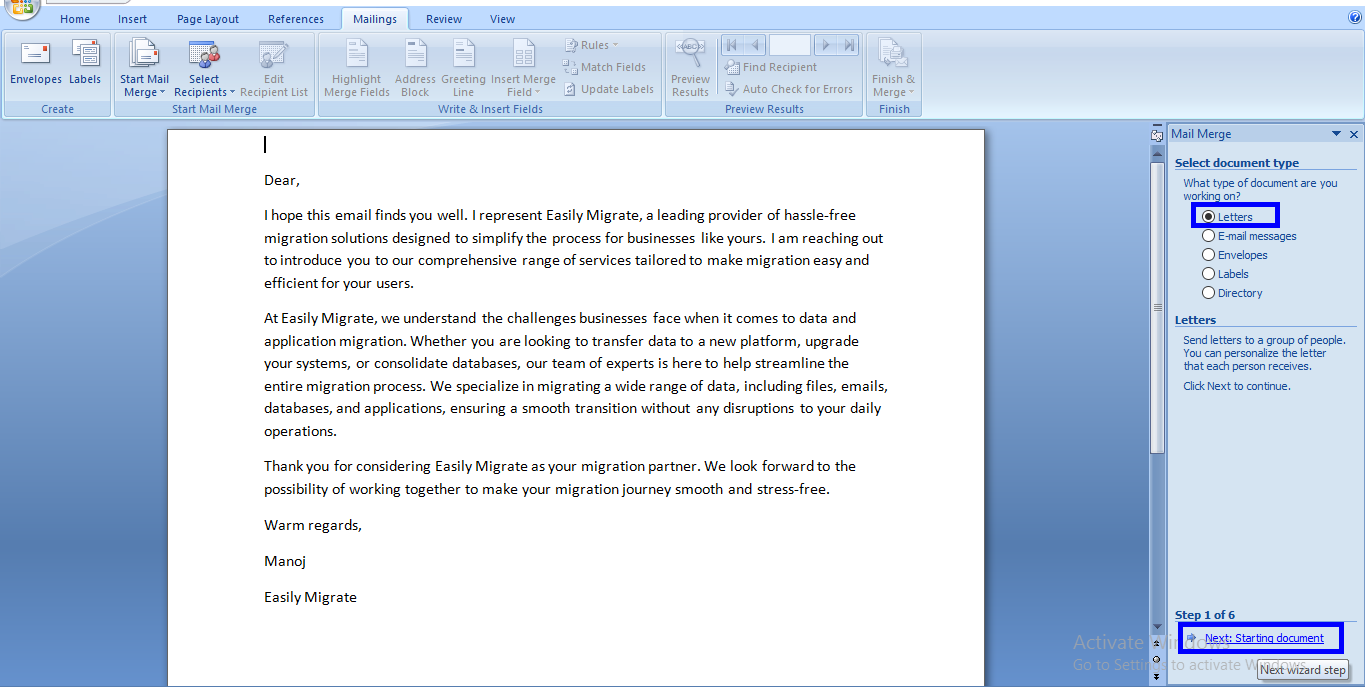
- Select the use the current document and then choose Next: Select recipient for further steps.
- Select Use an existing list, choose the browse option, choose the created excel sheet and then hit on next: write your letter.
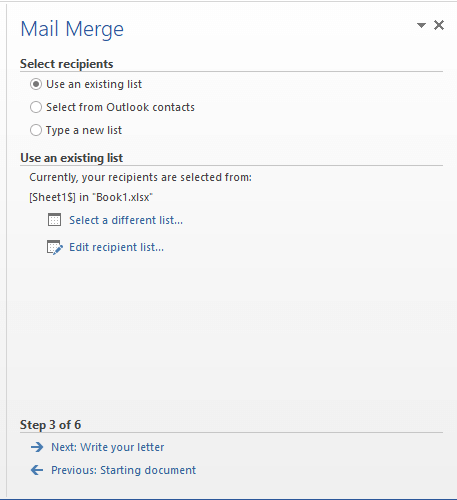
Note: You also have the option of manually typing the recipient list or selecting recipients from your Outlook contacts.
- You can make changes in your email or just skip by clicking on next: preview your letter.

- Hit on the Next: complete the merge.

The mail merge in Outlook is finished. Emails to the recipient list can now be sent. Merge fields such as name, email address, address, etc. are also available.
Add Send Bulk Email and Insert Merge Field
- Select the Insert Merge Field from the Mailing options and select the relevant options.

You have to open Outlook in order to send emails. If Outlook has more than one email account, make sure the email address you wish to use to send bulk emails is set as the default.
- Click Finish & Merge, and then select Send Email Messages to begin sending emails.
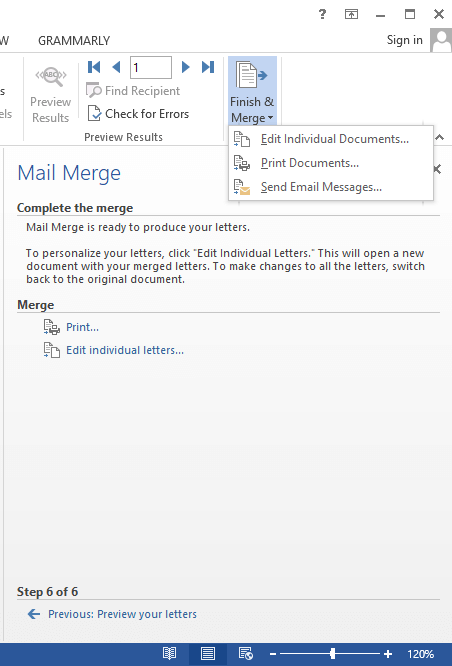
- Now the new window is opened as Merge to E-mail, select the subject line and then hit on the Ok.
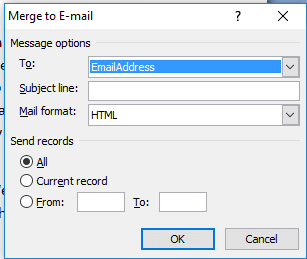
Your messages will be scheduled for sending in the Outlook Outbox once you click the OK button. One drawback is that you are unable to attach attachments while using the Mail Merge into Outlook.
Wrap-Up
We hope you found this post on mail merge in Outlook to send bulk emails to be both educational and useful. With this information, you may send mass emails Outlook and quickly and personally connect with a number of recipients. This feature can help you save valuable time when it comes to internal communications or marketing activities. By adding recipient-specific information to each email, you may personalize them and make them seem more thoughtful.
Read More: Migrate Office 365 to Google Workspace

