
Exporting Office 365 mailbox data to PST files is essential for backup, migration, or compliance purposes. Microsoft provides built-in methods to achieve this, ensuring data integrity and security. In this guide, we will explore the best 2 free ways to export Office 365 mailbox to PST file using eDiscovery, and Outlook. These methods allow administrators to handle mailbox exports while maintaining compliance with organizational policies efficiently.
Table of Content
Best Free Methods to Export Office 365 (Exchange Online) Mailboxes to PST
Method-1: Export PST from Office 365 using eDiscovery
The eDiscovery is the manual and free method to export Office 365 mailbox to PST provided by Microsoft. To use the eDiscovery tool, we have to grant some necessary permissions, which are explained step-by-step below.
Essential Requirements to Export PST from Microsoft 365 via eDiscovery
Before starting the backup process, the person who is going to export the Office 365 mailbox data should have an eDiscovery manager role for using eDiscovery method. Also, the person should have Global Admin or Compliance Admin Role to export mailboxes to PST.
Steps to assign eDiscovery manager role:
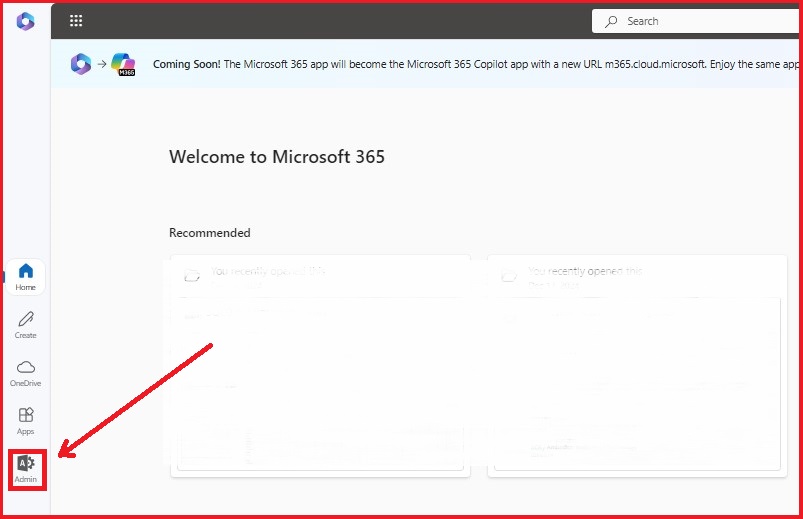
- Login Office 365 with your account credentials.
- Click on the “Admin” in the navigation pane on the left side of your computer screen.
- In the “Microsoft 365 admin center” click on the “Show all” button and choose “Compliance”.

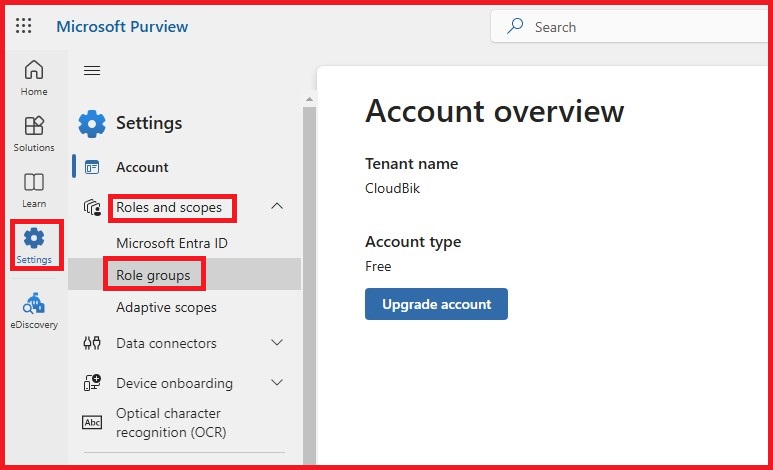
- Click on “Settings”, go to “Roles and scope” and now select “Role groups”.
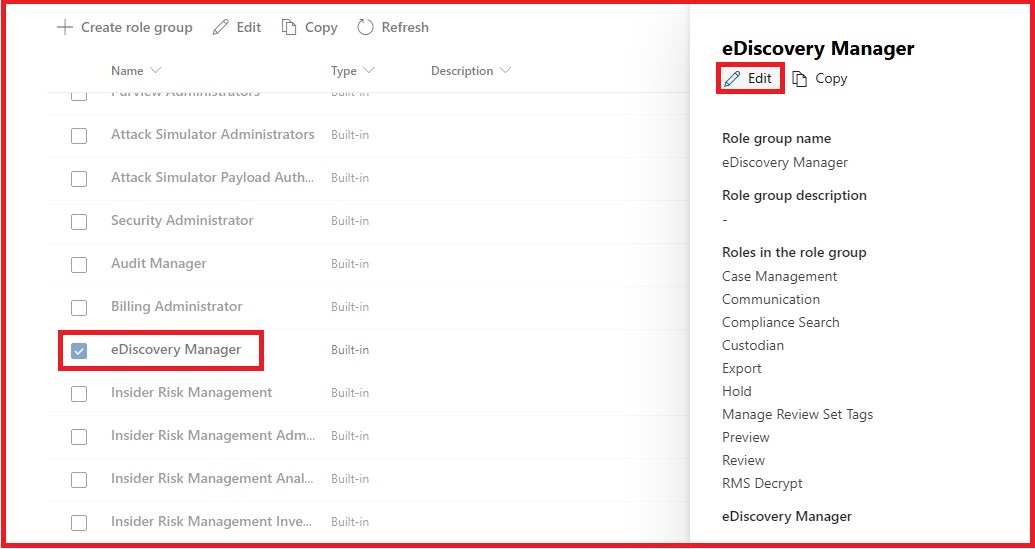
- Choose “eDiscovery Manager,” click on the “Edit” button.
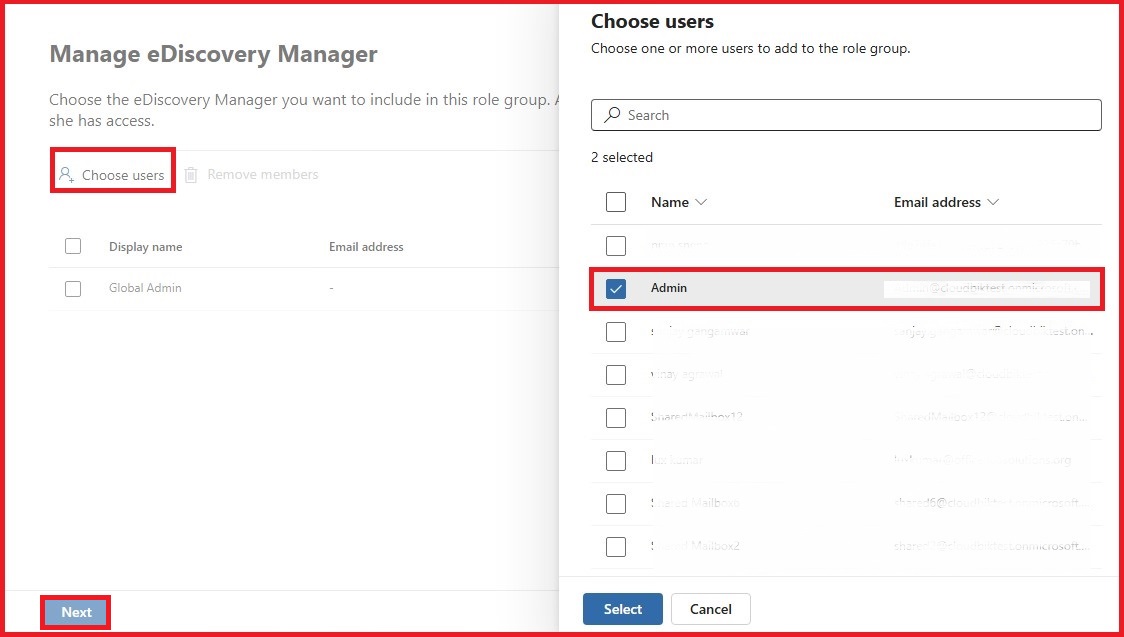
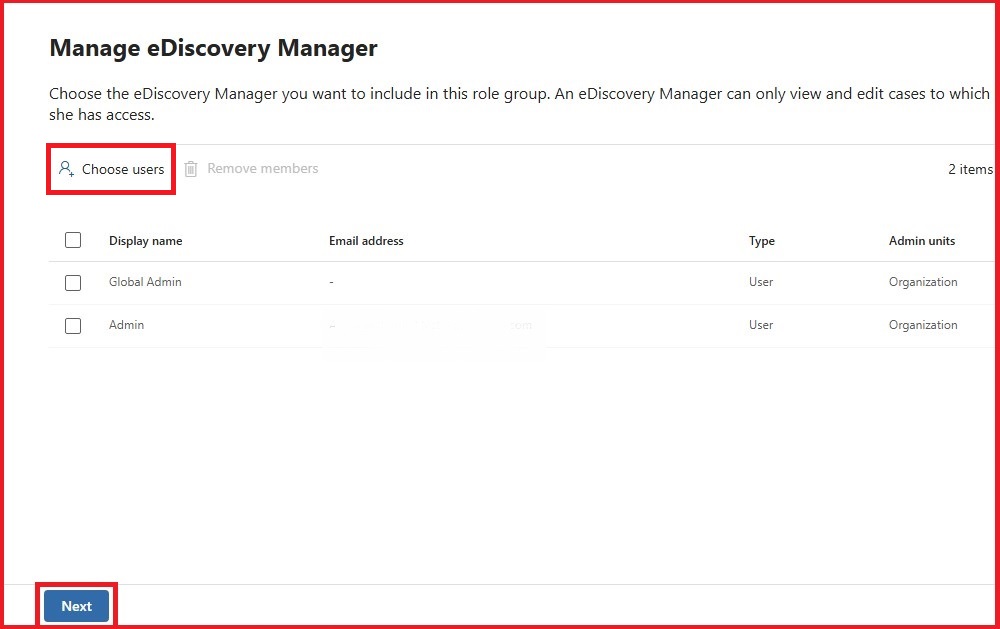
- Go to the “Choose users” and select the users whom you want to assign the eDiscovery manager role group. After that, click on the “Next” button to proceed with the process.
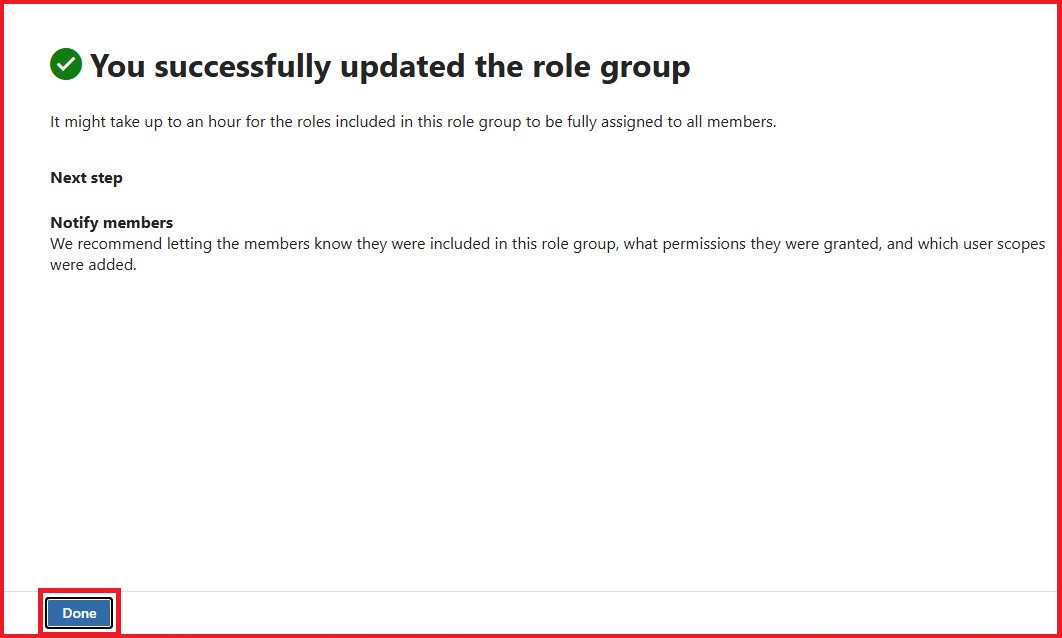
- Now “Manager eDiscovery Administrator” will be open, if you want to add another user as eDiscovery administrator, then add it, otherwise click on the “Next” button.
- Now click on the “Done” to end the process of assigning eDiscovery manager role.
Backup Office 365 Mailboxes to PST
After assigning the e-Discovery Manager role, follow the steps below to export PST from Microsoft 365.
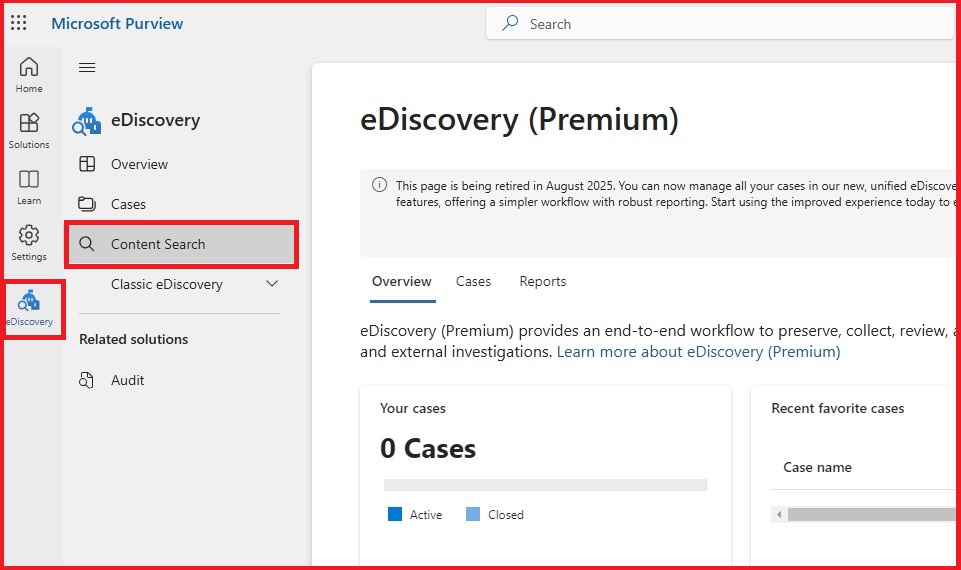
- Click on “eDiscovery” and go to the “Content Search”.
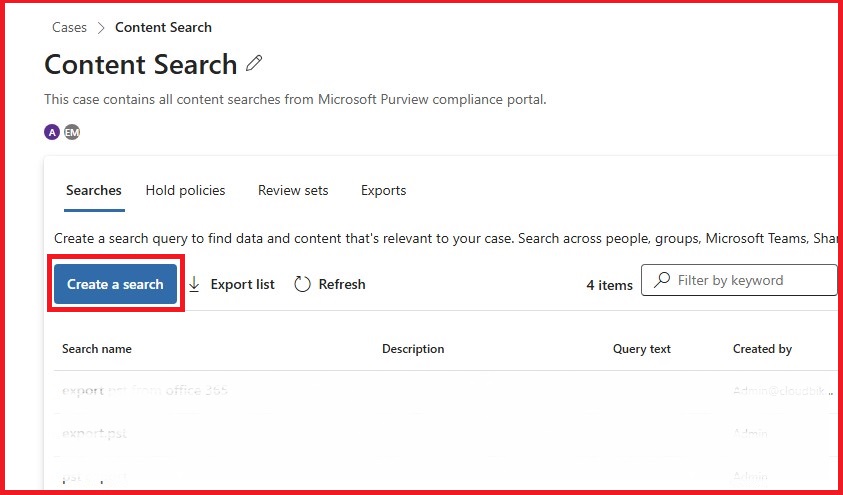
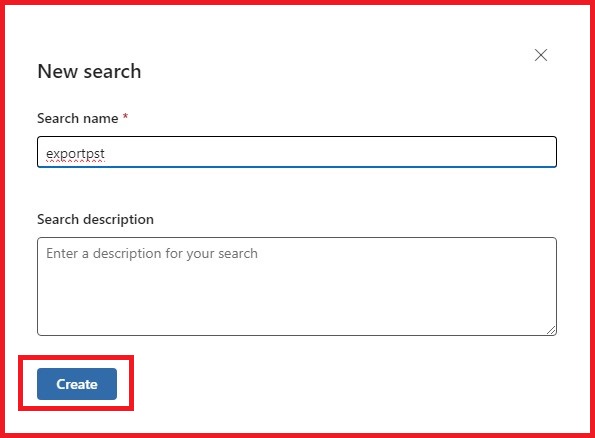
- In Content Search click on the “Create a search”.
- After that, enter the name, description, and click on “Create”
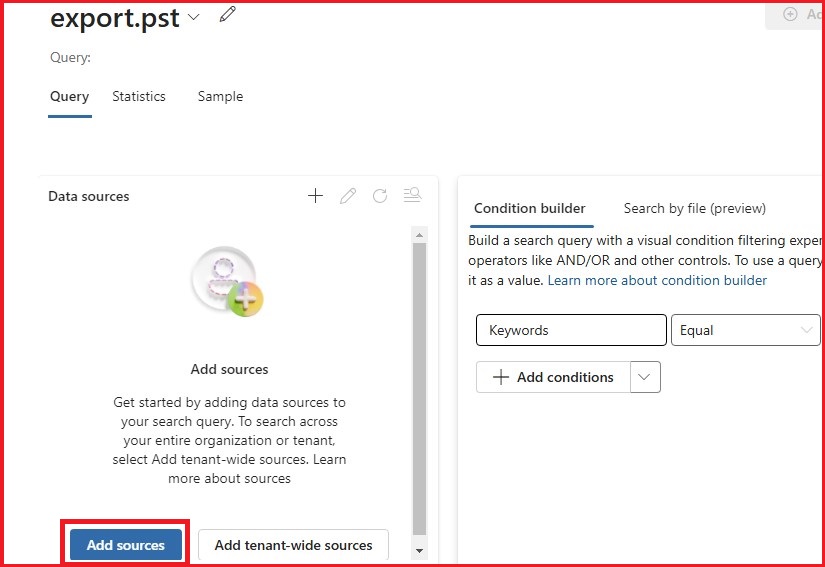
- Now your search name windows will be open, click on the “Add sources”.
- Select people and groups whose data you want to export in PST, if you want to backup all Exchange online Mailboxes, click on the “Select all”.
If you want to export only people or only groups data, choose “People only” or “Groups only,” then select all or specific accounts.
Now click on the “Save and close” button.
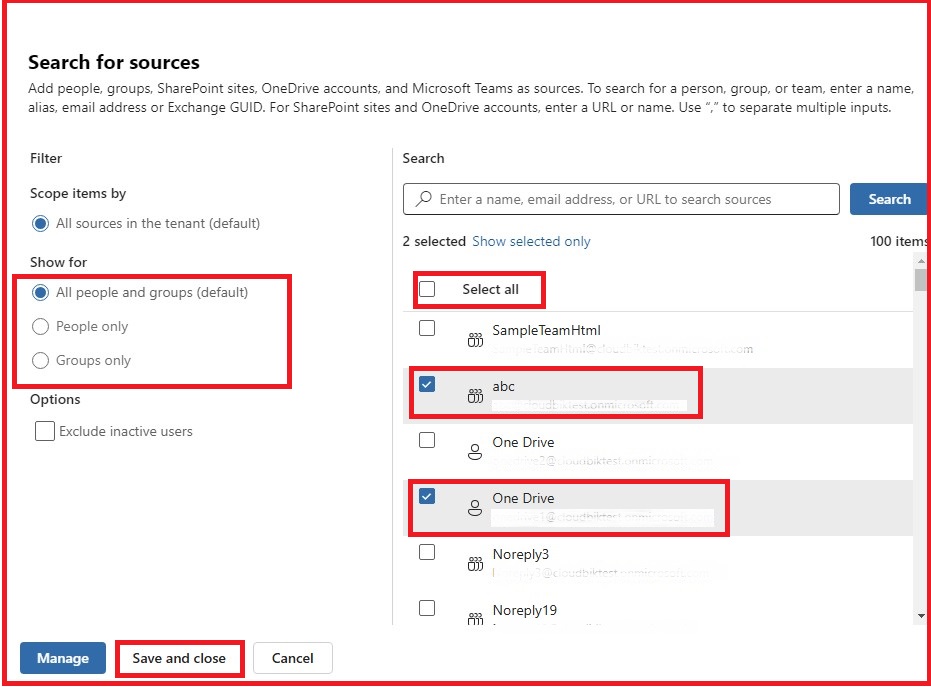
Note: If you want to export only Mailboxes or only Sites data, click on the Manage and choose Mailboxes or Sites, then click on the “Save” button.
- After that, click on the “Run query” button.
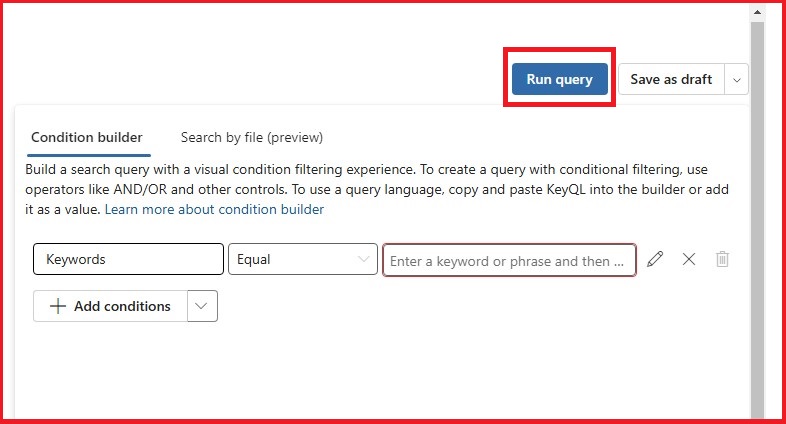
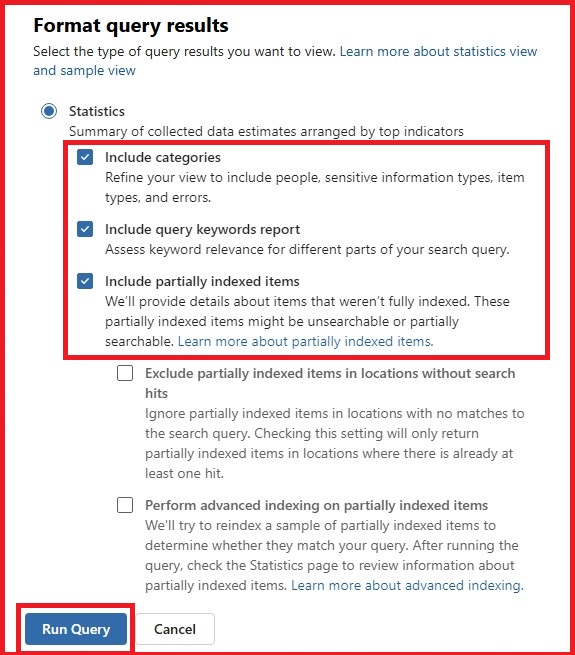
- A new window Format query results will open, check the box according to your requirement, and press the Run Query
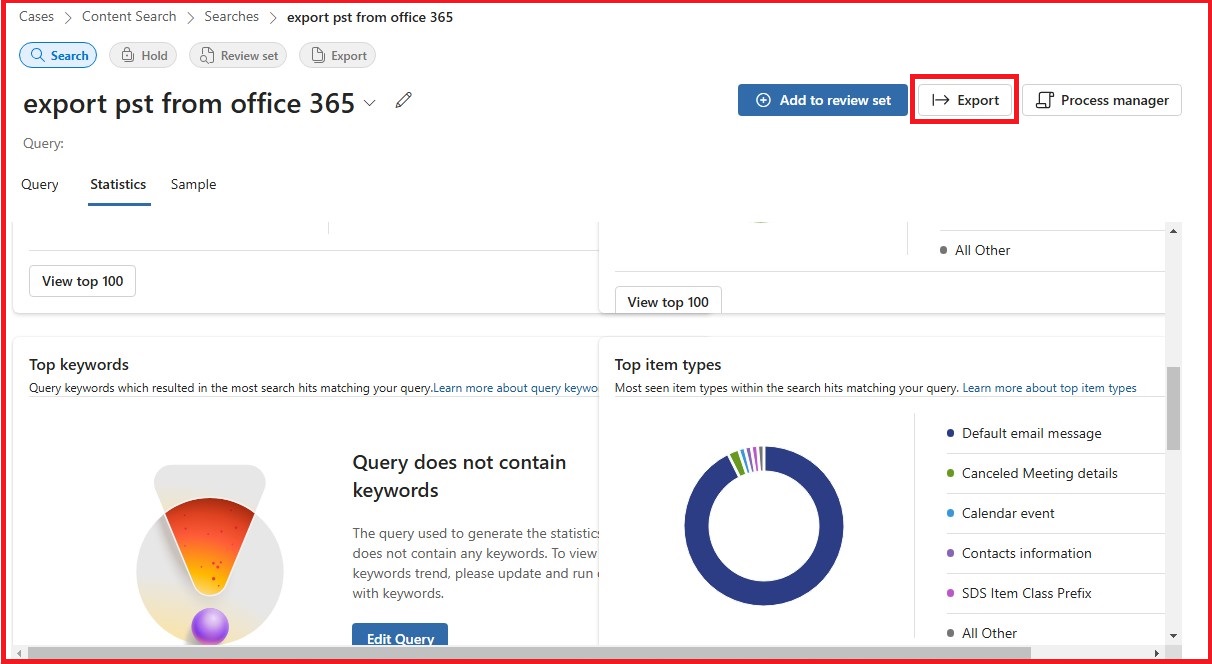
- Now the query will run, you will see the detailed summary in the statistics tab. Once done, click on the Export button to proceed with the process.
- In the Export window, enter the export name and description. Select the document version that you want to export. Now press the Export button to backup Exchange Online Mailboxes to PST.
Note: You can also export Office 365 Mailboxes to MSG via eDiscovery, for that simply go to the Export format and select MSG.
Method-2: Export Office 365 Mailbox to PST file Using Outlook Import/Export Wizard
You can also export PST files from Office 365 using MS Outlook. This is one of the easiest manual methods to move Exchange Online mailboxes to PST file format. However, before starting the process, you need to fulfil a few prerequisites. These essential requirements must be met to ensure a smooth and error-free export process. Below we will discuss step-by-step.
Prerequisites to Export PST files from Microsoft 365 (Exchange Online) via Outlook
To move PST file from Office 365 via Outlook. You must have added your Office 365 account in Outlook, follow the below steps to easily add your account in Outlook.
- Open Outlook Desktop application on your system or laptop.
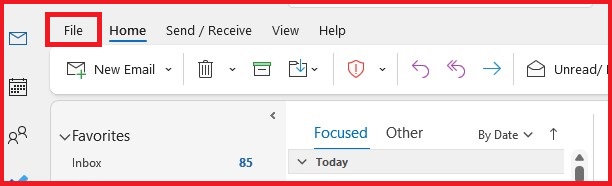
- Go to the “File” tab on the left side of your computer screen.
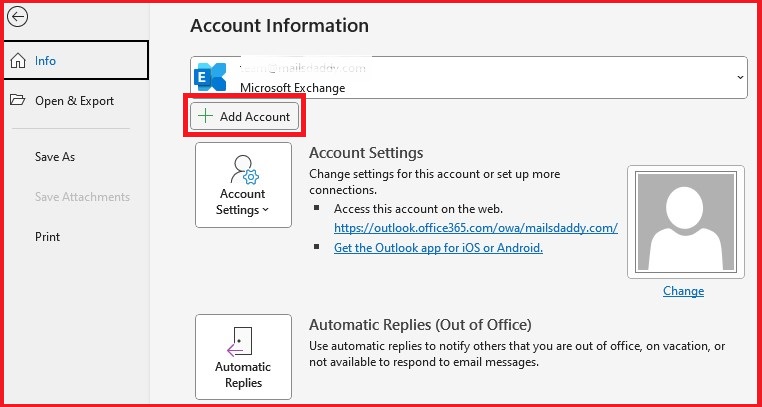
- Click on the “Add Account” button.
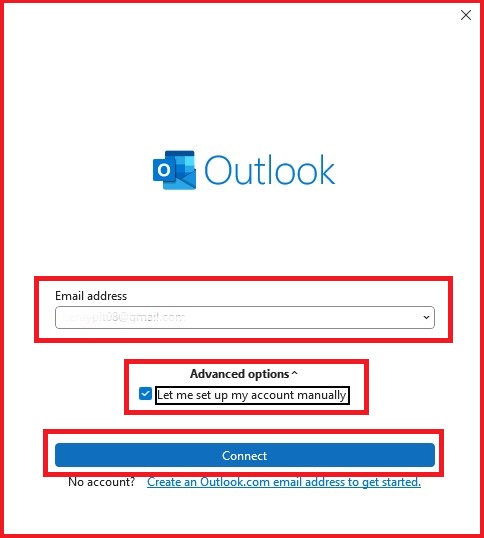
- Now a new window will be opened, provide “Email address” and click on the “Advanced options” then choose “Let me set up my account manually” after that click on the “Connect” button.
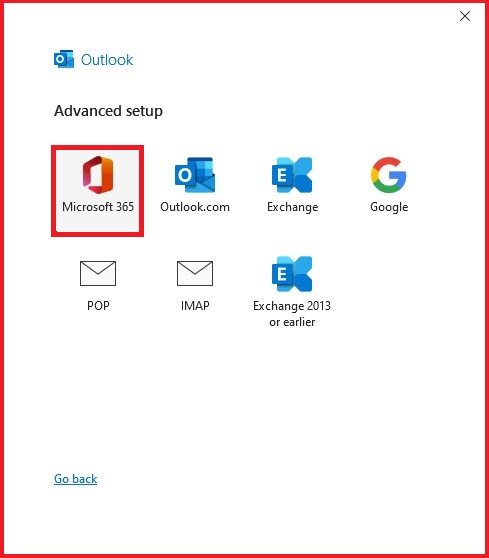
- Click on the “Microsoft 365” then login with your password.
- In the Exchange Account Settings, uncheck the “Cached Exchange Mode” box and click on the “Next”.
- Once your account is successfully added, click on the “Done” button and restart Outlook.
Step-by-step Guide to Backup Office 365 mailbox to PST file
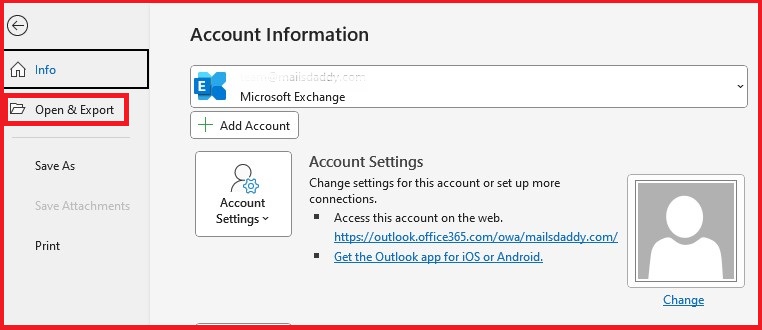
- Open your Outlook and click on the File button then choose Open & Export.
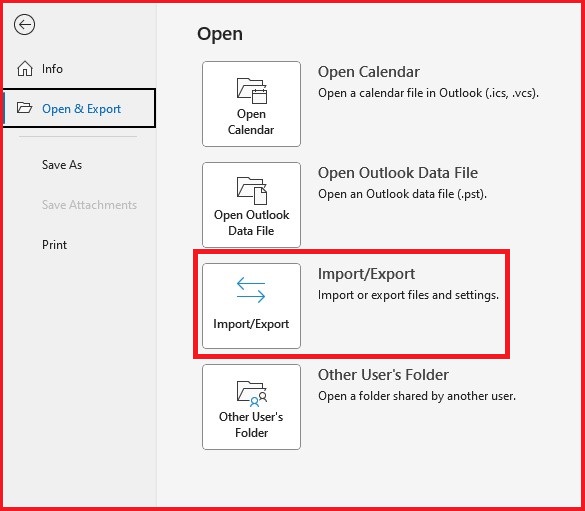
- In the Open & Export, click on the “Import/Export”.
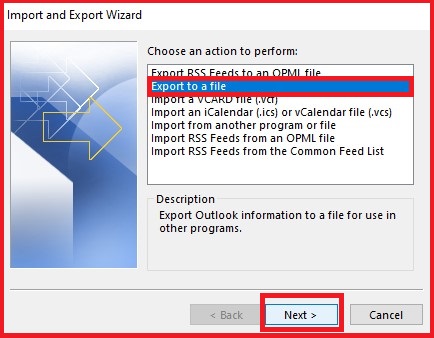
- Now a new window will be opened on your computer, choose “Export to a file” and hit the “Next” button.
- Now select “Outlook Data File (.pst)” and click on the “Next”.

- Choose the “email account” you want to export as displayed in the image below. Keep in mind that only one account can be exported at a time. Ensure the “Include subfolders” checkbox is selected to export all items within the account, including Inbox, Calendar, Contacts, and Tasks. Click “Next” to proceed.

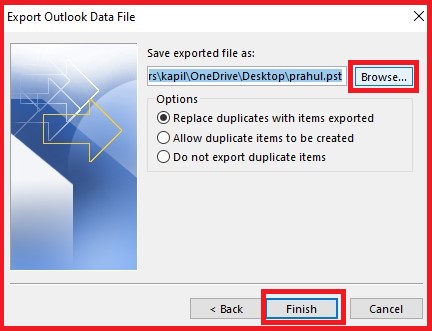
- Click on the Browse button and give the destination path to save the PST file, after that press the “Finish” button to export the Exchange Online mailbox.
Final statement
In this blog, we have discussed the top 2 free methods to export Office 365 mailbox to PST with the step-by-step process. Both eDiscovery and MS Outlook methods are user-friendly and provide effective ways to transfer PST file from Exchange Online. To efficiently extract mailboxes from Office 365 to PST format, choose one of them and follow the steps.
Note: If you want to import PST files to Office 365 (Exchange Online) then visit the below link.
Read More: How to Import PST to Office 365