Microsoft 365, now known as Office 365, is a robust platform that provides productivity tools like Excel, PowerPoint, Outlook, OneDrive, Microsoft Teams, etc. It also offers online storage and cloud-connected features that help users to manage data in real-time. Today millions of users and businesses use it daily for efficient communication and collaboration. As organizations grow, everyone on your team needs a user account to access all the services of Microsoft 365 such as email and Office 365 apps. There are two ways to create single or bulk user accounts in Office 365 first using the admin center and second via Windows PowerShell.
In this article, we will discuss the process step-by-step. Let’s explore how you can efficiently add single or multiple users in Office 365.
How to set up single or bulk users in Microsoft 365 using Admin Center:
Adding single or multiple users in Office 365 by using the Admin Center is simple. It allows administrators to add users, assign licenses, and configure roles efficiently, streamlining user management.
Adding a single user in Office 365 through the Admin Center:
To efficiently add the user in Office 365 follow the steps below:
- Log in to your Microsoft 365 account using admin credentials.
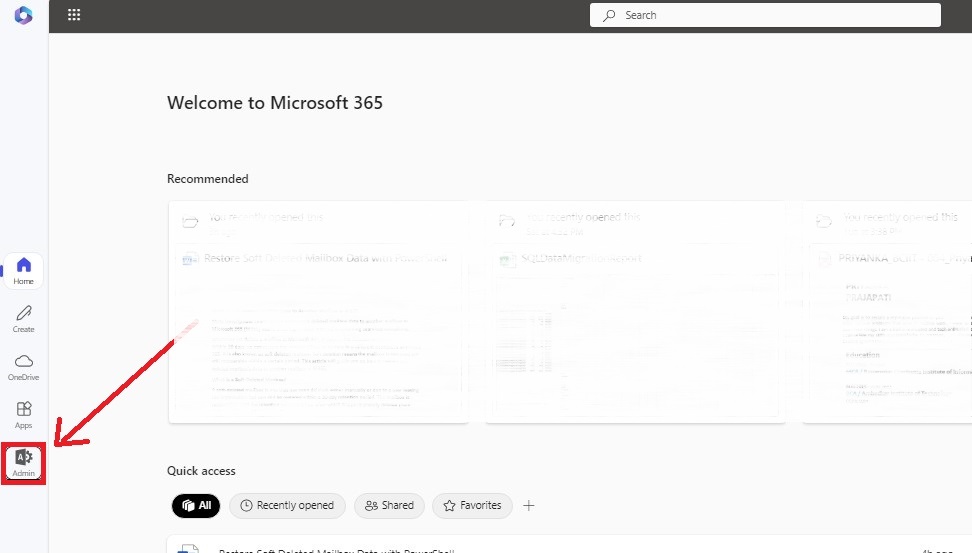
- Now go to the “Admin” tab on the left side of the screen.
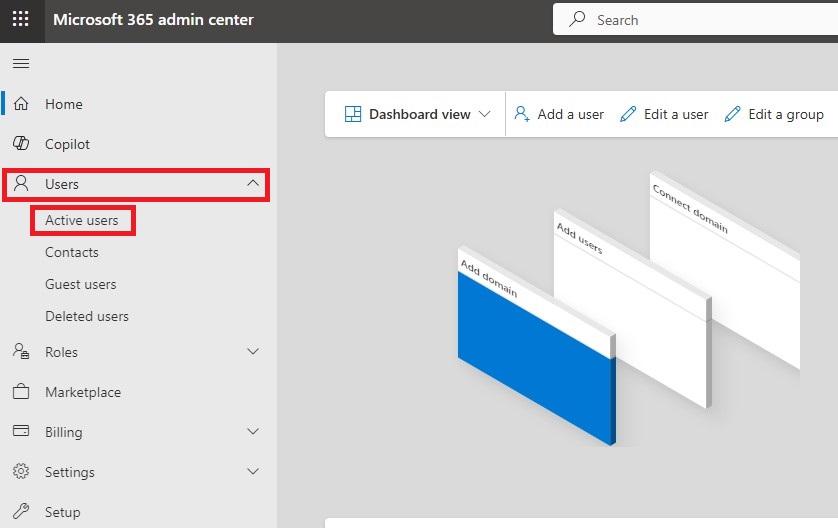
- Click on the “Users” and choose “Active users”.
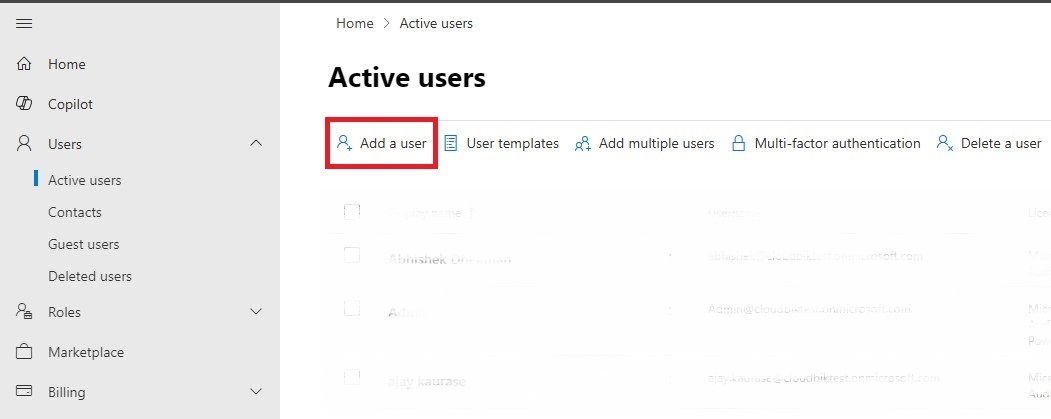
- Now In the “Active users” window click on “Add a user”.
- Fill in the required details, such as username, and display name. Now click on the box to Automatically create a password or you can choose your own password.
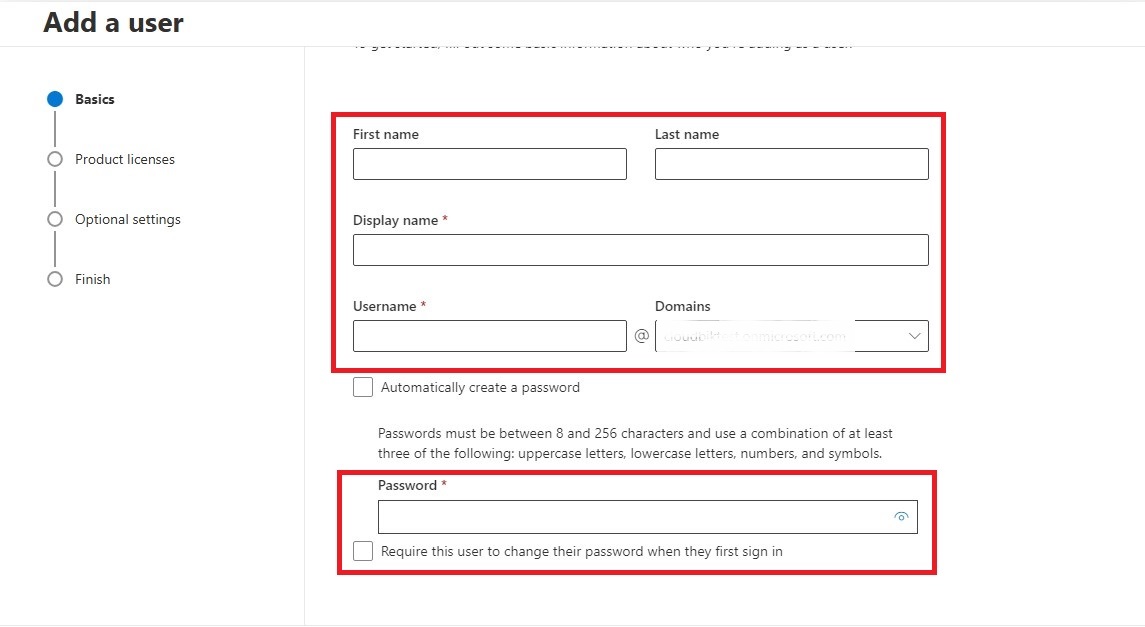
- After providing all the details and password click on “Next”.
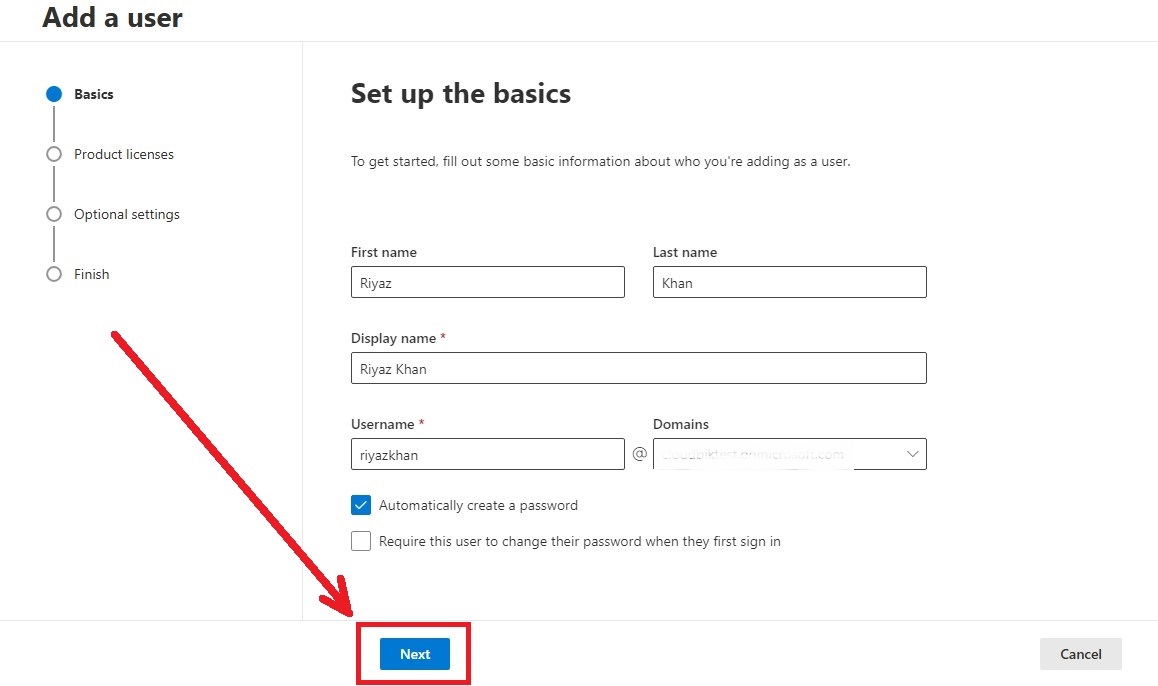
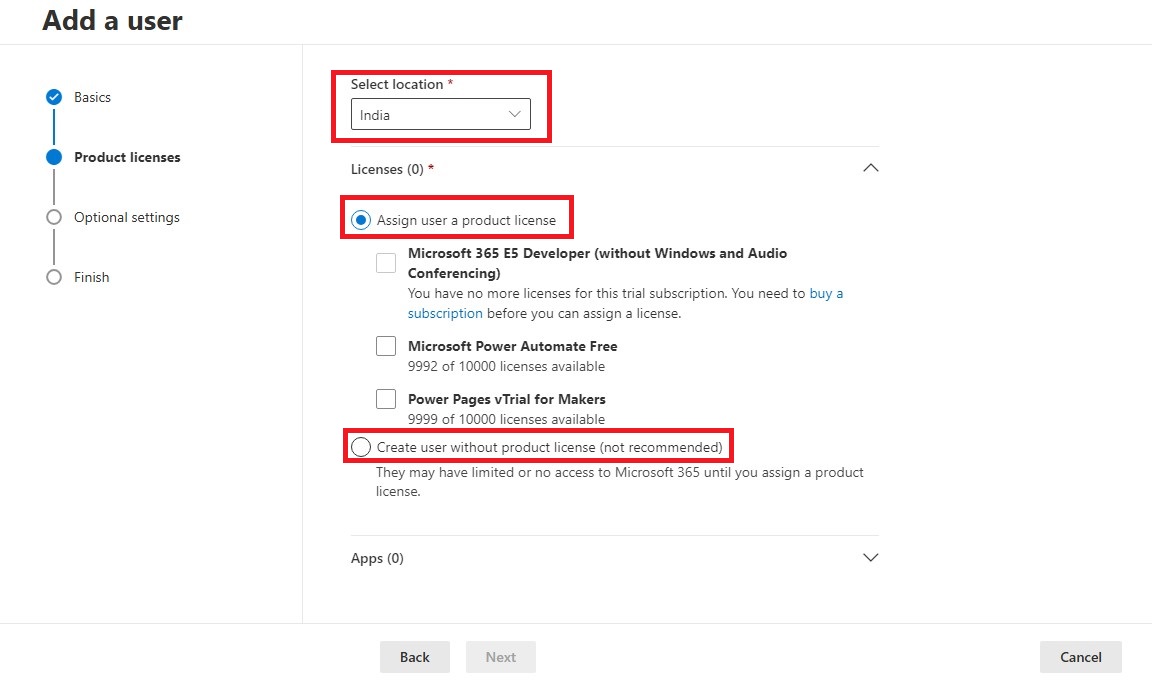
- Select the location and choose if you want to assign the user a product license or not.
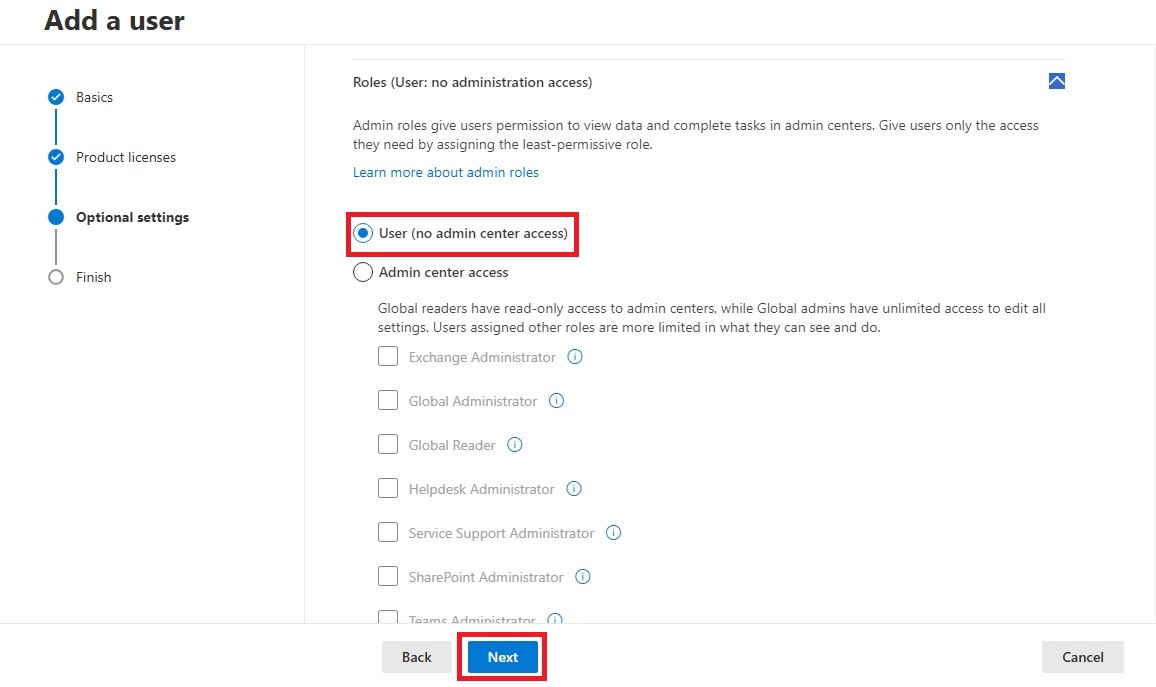
- Now you will see an optional settings window, if you want to assign any role to the user click on the “Admin Center Access“, then choose any one of the below including Exchange Administrator, Global Administrator, Global Reader, etc.
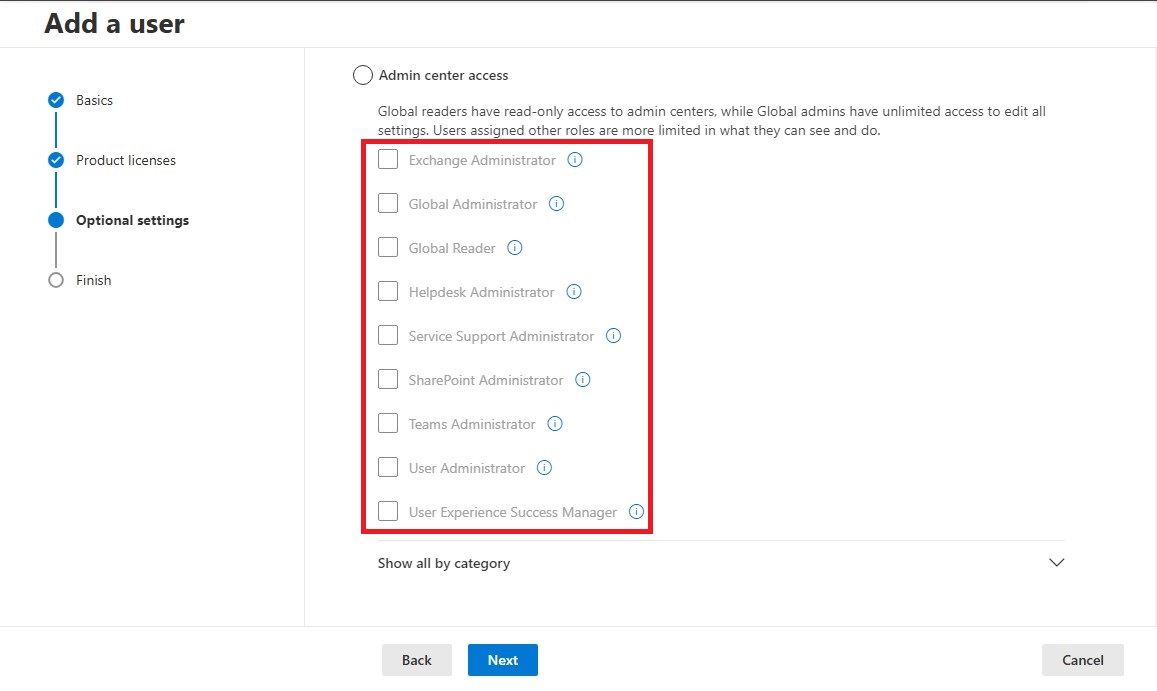
- If you are not interested in assigning the role then just click on User (no Admin Center access) and then press the Next button to proceed further.
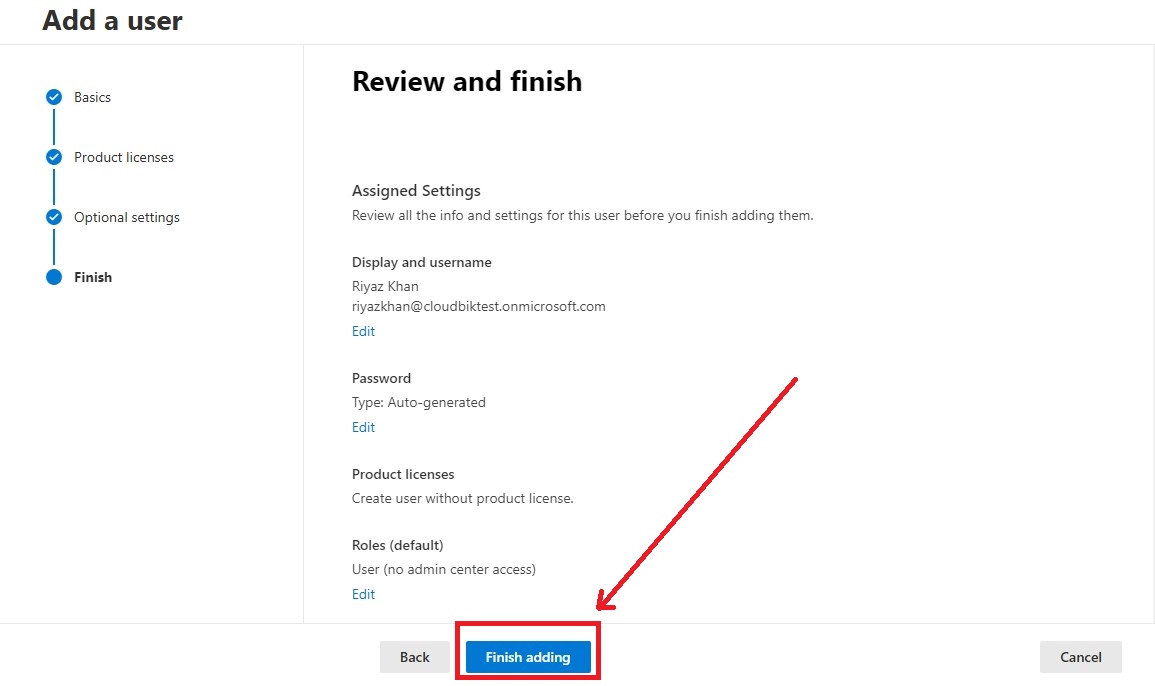
- Finally, review all the given details if all is good click on the “Finish adding“.
Create bulk user accounts in Microsoft 365 using Admin Center:
Creating bulk user accounts in Office 365 is as simple as the above-mentioned method. The first three steps are the same as above until the Active Users tab.
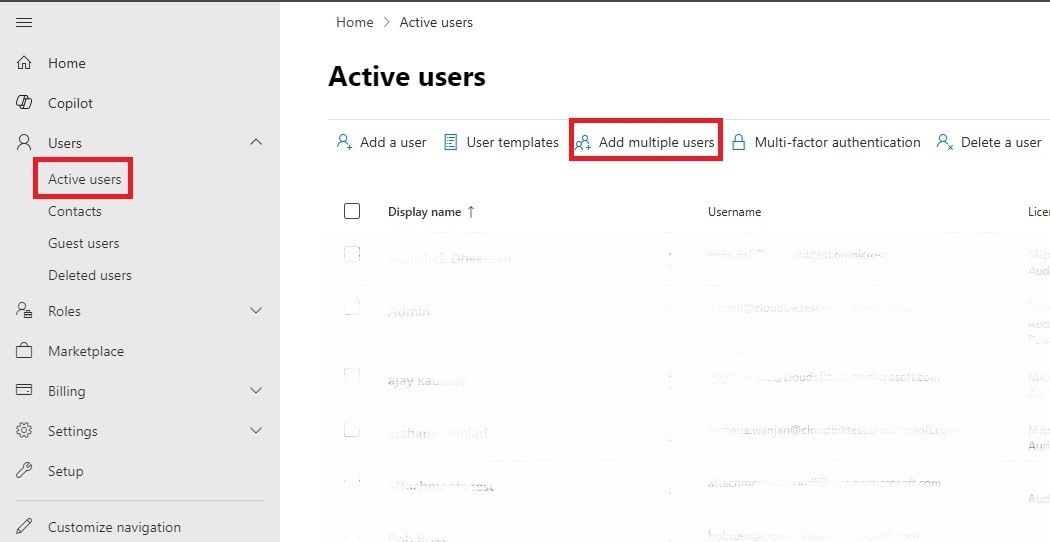
- In the Active Users tab click on the “Add multiple users”.
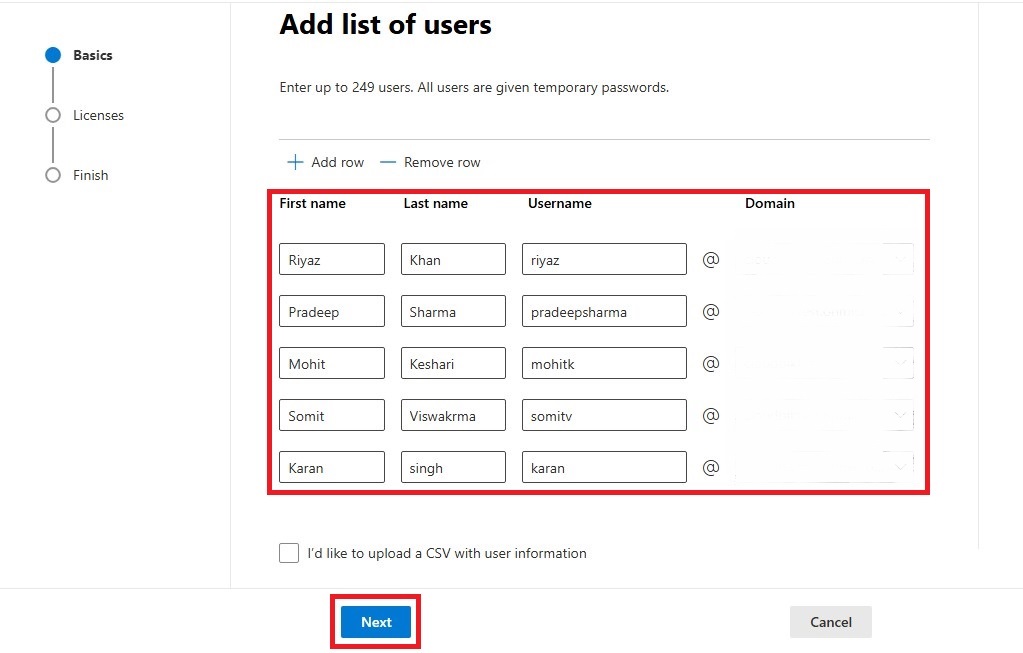
- Now you will see a window “Add list of users”, fill in all details like First Name, Last Name, Username, and Domain.
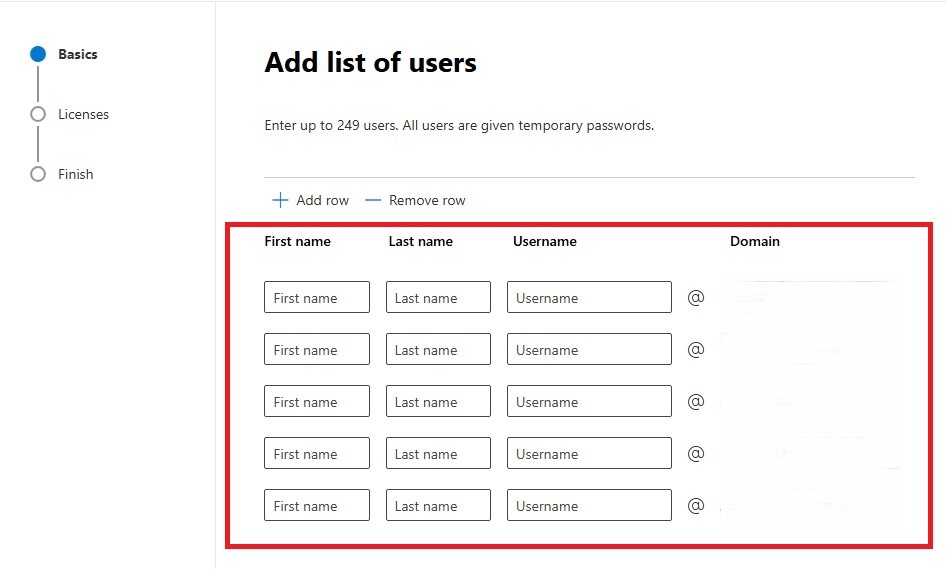
- After filling in all the details click on the “Next” button to proceed with the process.
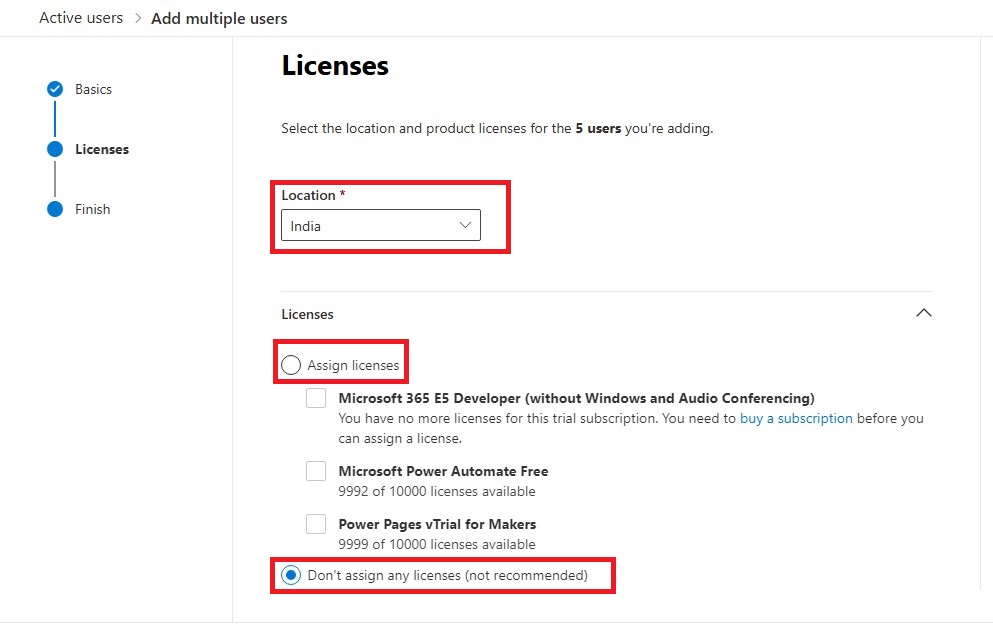
- Select Location and assign an appropriate license by choosing from the list, if not simply click on the “Don’t assign any license (not recommended)” then press the “Next” button.
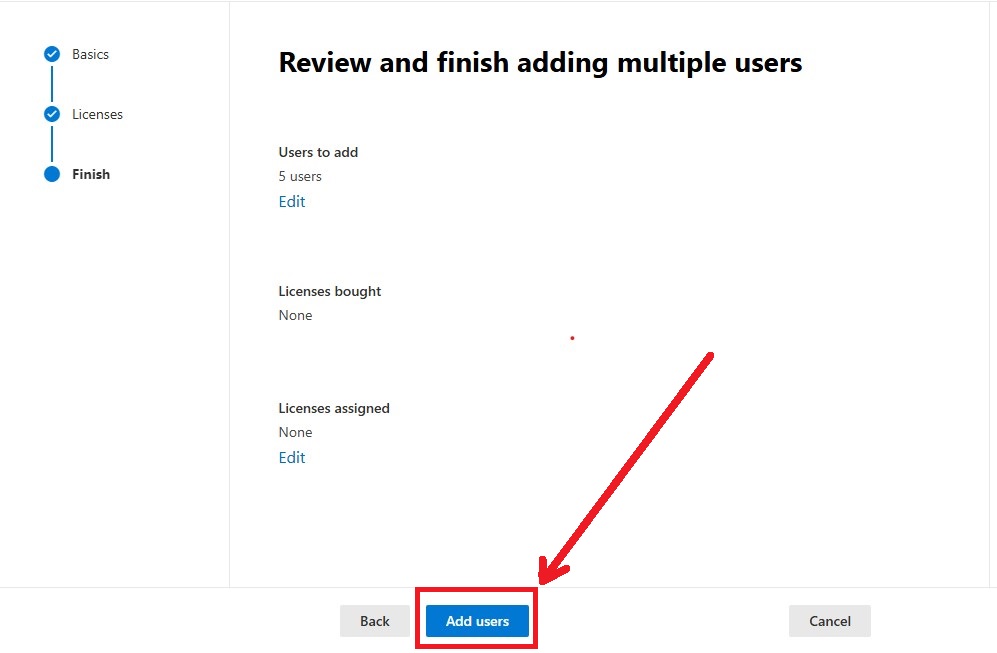
- Review and click on the “Add users” button to complete the process of adding multiple users.
Note: With the Admin Center you can add up to 249 users without using a CSV file, it may be difficult to add details of multiple users, so it is better to use the CSV option to add bulk users.
How to add multiple users to Office 365 from CSV:
Adding multiple user accounts from CSV is hassle-free and saves you valuable time. Follow these below steps for efficient bulk account creation.
- First log in to your Microsoft 365 account and go to the “Admin Center” then select Users.
- Now click on the “Active users” button then go to the Add multiple users.
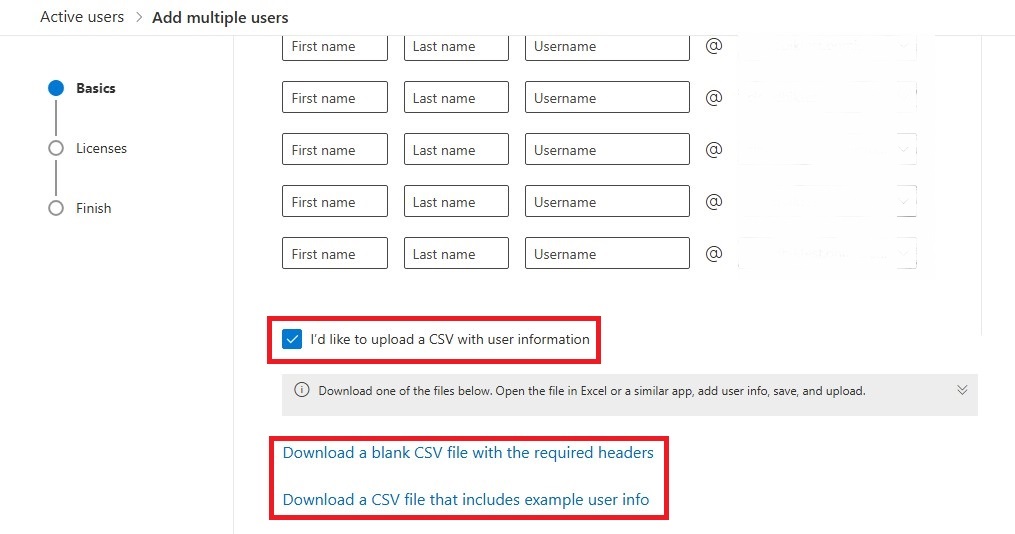
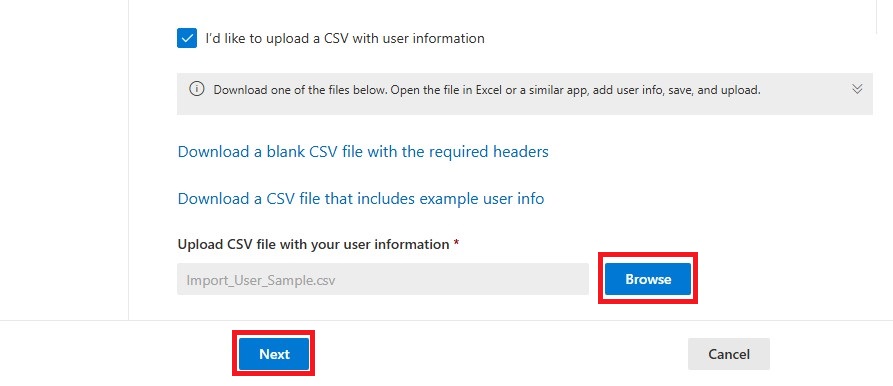
- After that click the box I’d like to upload a CSV with user information then download the sample CSV template provided by Microsoft. Ensure the file includes columns like Username, Display Name, and Email Address.
- Now fill in all details including Username, First Name, Last Name, Display Name, Job title, etc.
- After that save the file and click on the “Browse” button to upload your CSV file then press the “Next” button.
- Now choose the role and license if not interested click on Don’t assign any licenses (not recommended).
- Click on the “Next” button and review your settings then click on the “Add users” button to confirm the bulk user creation.
How to create bulk users in Office 365 using PowerShell:
- First, you need to connect MS Online to PowerShell. For that open Widows PowerShell as Administrator and run the below PowerShell command then give your credentials.
Install-Module MSOnline

Import-Module MSOnline

Connect-MsolService
- Now prepare a CSV file including all details like Username, First Name, Last Name, Display Name, etc.
- Modify the path of the CSV file and run the below PowerShell Commands.
# Import CSV file
>> $UserList = Import-Csv -Path "C:\Users\kapil\Downloads\users.csv"

>> # Loop through each user in the CSV file

>> foreach ($User in $UserList) {

>>     $Username = $User.Username

>>     $DisplayName = $User.DisplayName

>>     $FirstName = $User.FirstName

>>     $LastName = $User.LastName

>>

>>

>>     # Create the user

>>     $NewUser = New-MsolUser -UserPrincipalName $Username -DisplayName $DisplayName -FirstName $FirstName -LastName $LastName

>>

>>     Write-Host "User created: $($NewUser.UserPrincipalName)"

>> }
- After providing the above PowerShell command, the users will be created per the CSV file properties as shown in the output below.
Wrap-Up:
In this article, we have learned how to create single or bulk users in Office 365 using the Admin Center and PowerShell. We have explored step-by-step processes to add users, assign licenses, and configure roles efficiently. Additionally, we covered importing user details via a CSV file to streamline bulk account creation, ensuring efficient user management in Microsoft 365.
Also Read: How to add signature in Outlook

