One of the most frequent administrative tasks in email systems like Microsoft Exchange or Office 365 is to convert a user mailbox to a shared mailbox. Without requiring a unique user account, a shared mailbox enables several users to view and control emails sent to a single email address. For cooperative uses, like departmental email address management or team inbox management, this can be helpful. The following instructions will help you convert mailboxes to shared mailbox.
Table of Content
Converting regular mailboxes to shared mailboxes can offer several advantages in various organizational contexts. Here are some reasons why organizations choose to make this conversion:
- Teamwork & Collaboration: Multiple users are supposed to be able to access shared mailboxes. This is especially helpful for departments or teams that have to work together to manage a shared email account, like the inbox for the sales or support teams.
- Resource Efficiency: A dedicated user license is not necessary for shared mailboxes. When many people need to access a mailbox without creating separate user accounts, this can be a financially sensible solution.
- Security and Auditing: You can better control who can access which email accounts by using shared mailboxes. Permissions can be configured by administrators to guarantee that mailbox content can only be viewed and managed by authorized users. Better security and auditing procedures result from this.
When it comes to team-based projects, where workers need to work together to complete the task at hand and communicate with the outside world via the same email account, shared mailboxes are incredibly beneficial.
To change a user’s mailbox to a shared mailbox, there are three steps involved. Let’s study each of the three approaches.
With this method, users can switch to a shared mailbox straight away.
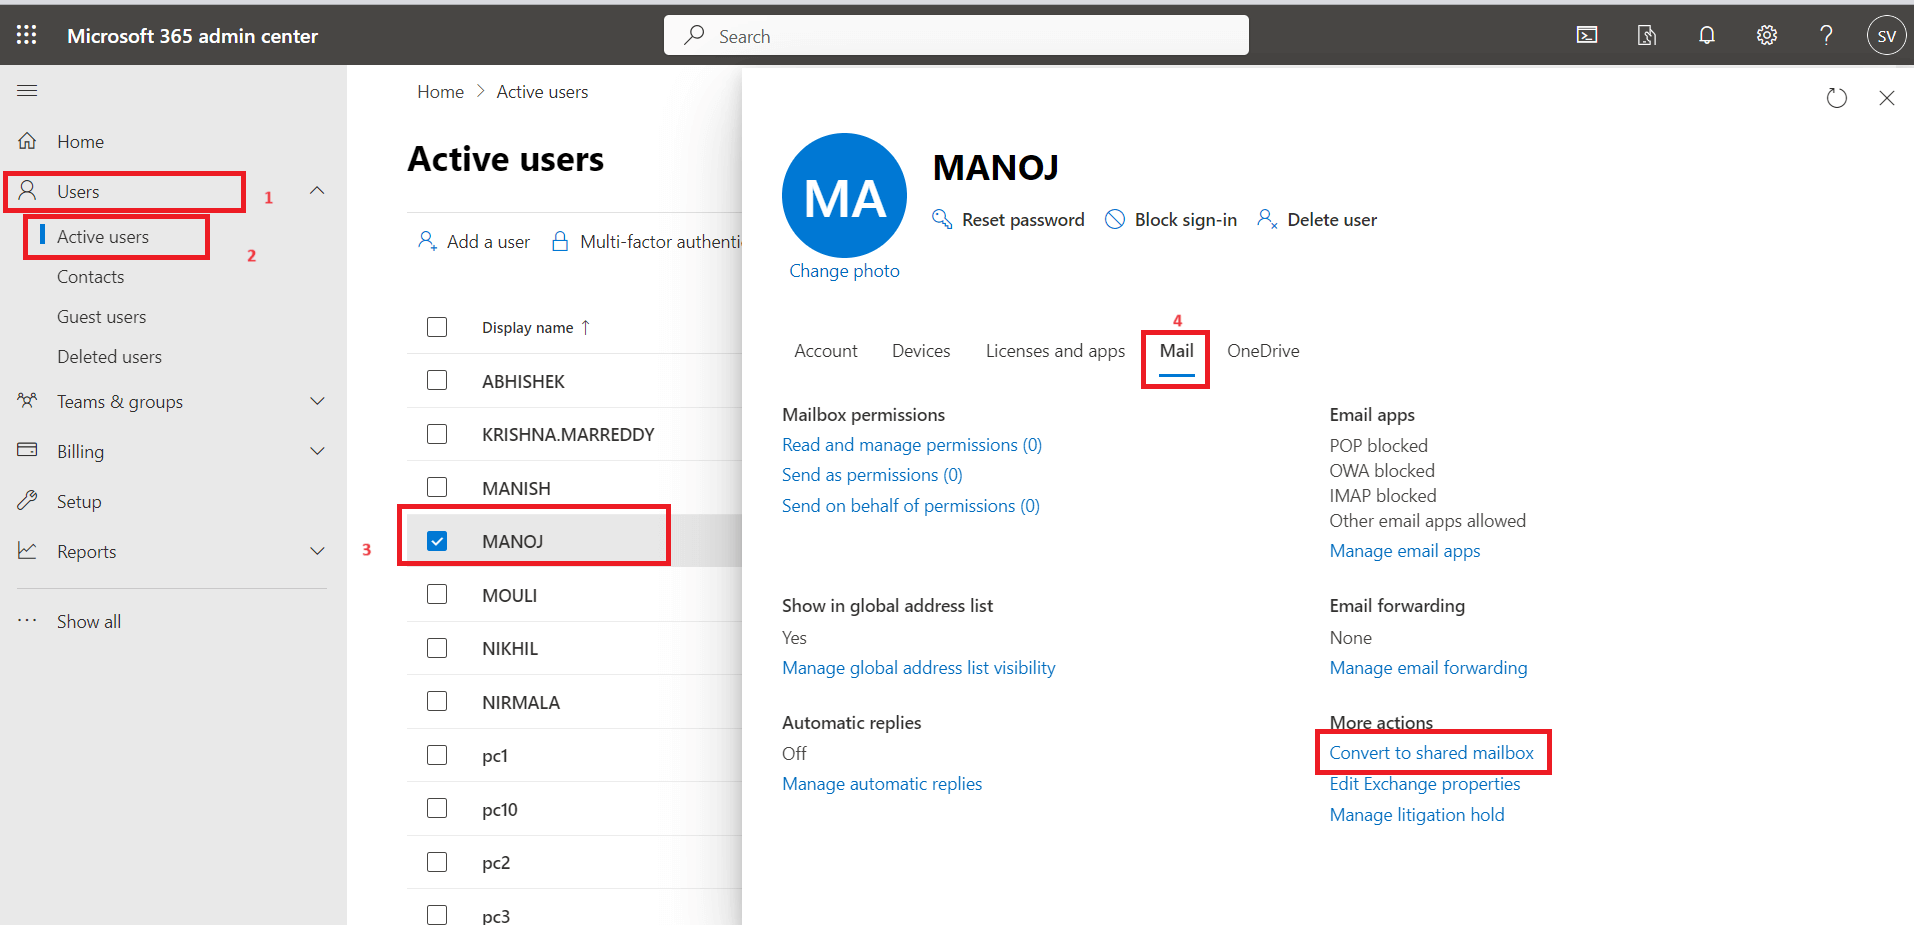
- Go to Microsoft Admin Centre.
- Go to Users > Active users > select any of the user from the list, and open mail window and in the more actions, press on convert to shared mailbox.

- Press on the key Convert.

- You can see your converted shared mailboxes below the option of teams & groups.

By using Exchange Admin Center, users can change their regular mailboxes to shared mailboxes.
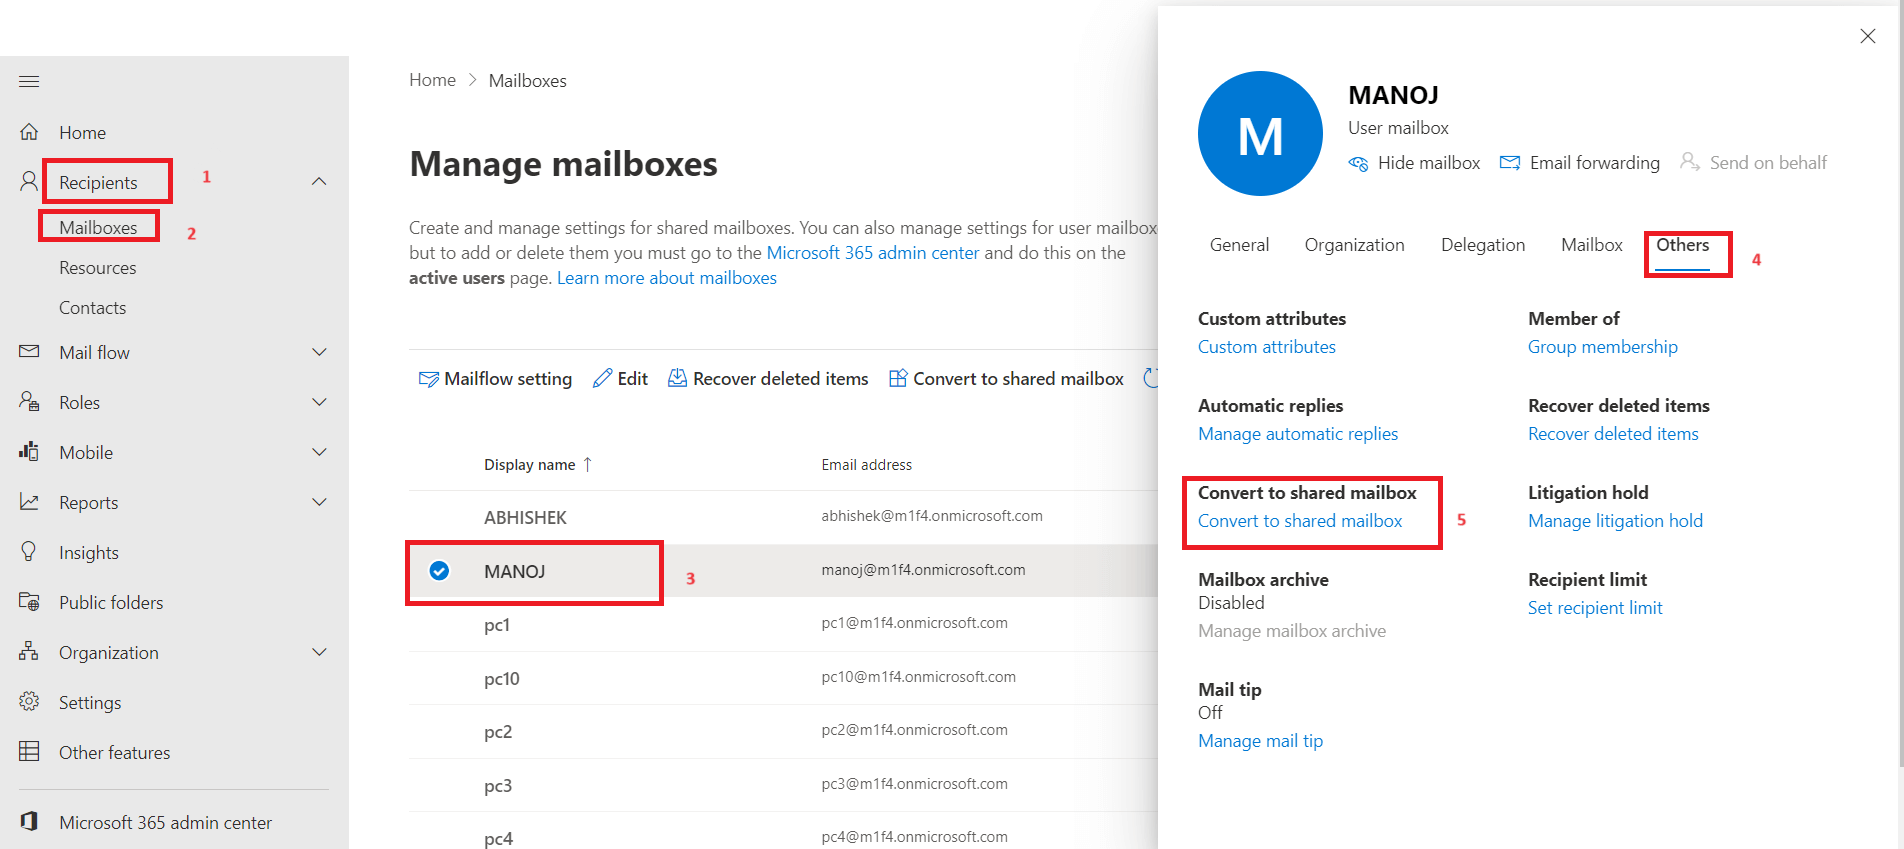
- Go to Exchange Admin Centre.
- Select Recipients > Mailboxes > select any user from the list > click on Others tab and select convert to shared mailbox.

- Confirm the conversion of mailbox.
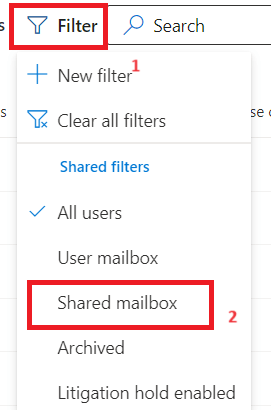
- The same user’s mailbox contains records for the shared mailbox. Users can click Filter > Select Shared Mailboxes to quickly check it.

An additional method for the conversion is PowerShell. To make the mailbox a shared mailbox, you only need to execute one command. Make sure the Exchange Online Module is installed in PowerShell before beginning the process.
We will use the Set Mailbox cmdlet to change the regular mailbox to a shared mailbox. The email address and mailbox name are all that are required.
- Connect with Exchange Online through Windows PowerShell.
1 |
Connect-ExchangeOnline |
- Convert Mailboxes to Shared Mailbox
1 |
Set-Mailbox -Identity pradeep@cloudbik.onmicrosoft.com -Type Shared |
To find out whether the email conversion was successful or not, we employ the various commands listed below:
1 |
Get-Mailbox -Identity pradeep@cloudbik.onmicrosoft.com | Select Name, RecipientTypeDetails |
Wrap- Up
In this blog, we have seen how to convert mailboxes to shared mailboxes with multiple methods. Converting regular mailboxes to shared mailboxes is a strategic choice that supports collaboration, efficiency, and better management of email-related tasks within an organization. The decision to make this conversion should be based on the specific needs and workflows of the organization or team involved.
Read More:
Enable Outlook 365 Email Forwarding

